PRODUCT
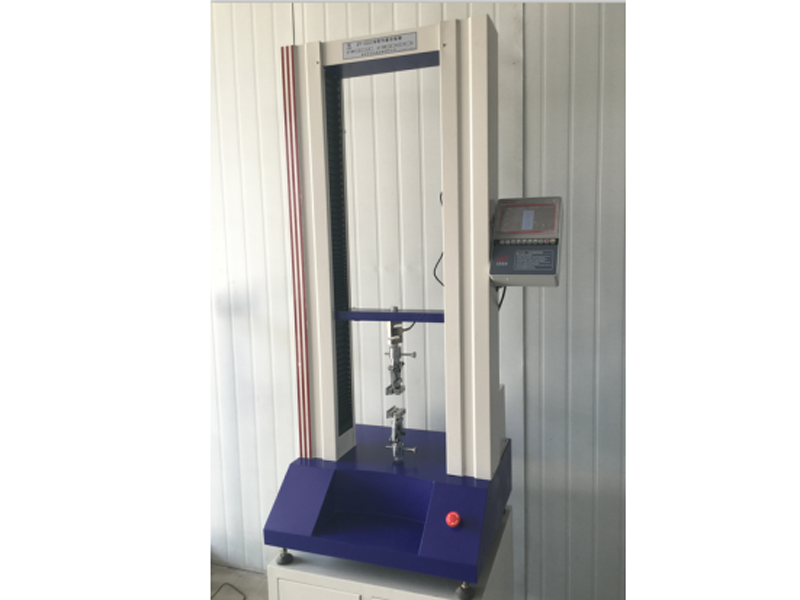
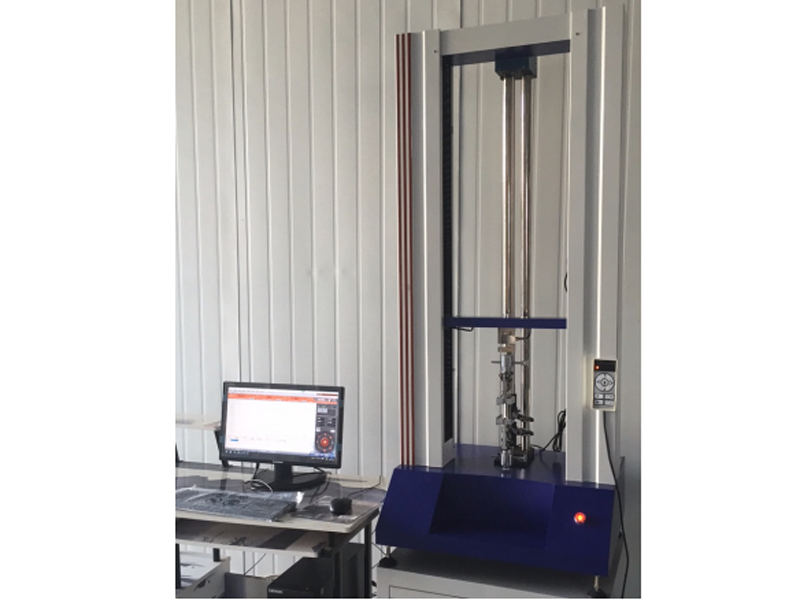
ZY-5000N Fabric Geo-bulla Machine
The ZY-5000N geo-bulla machine is an instrument used to test the mechanical properties of materials such as stretching, peeling, tearing, and H extraction. It is widely used in rubber, plastic, textile, chemical, steel wire, hose tape, wire and cable, plastic, pipe and other industries. It is a high-precision, economical and practical instrument.
The tensile machine is composed of a host, a speed control system, data acquisition and processing, sensors and electrical interlocking parts. The host includes the fuselage, transmission mechanism, and measurement system. Data processing is handled by a microcomputer processor. This machine uses a stepping speed regulator to change the stretching speed, and the speed value is directly read out. The motor moves the lower gripper (fixture) through the V-belt-worm-screw drive, so as to realize the tensile change of the sample. The head of the main unit is equipped with a tension sensor, and its upper end is connected with the connecting plate of the top beam of the main unit, and the lower end is connected with the upper clamp. The sensor is only subject to vertical tension and is not affected by torsion or directional force to ensure force measurement accuracy. Between the upper and lower grippers, the force of the sample during the test is transformed into an electrical signal through the force sensor and input into the microcomputer acquisition control system. After the test is over, it is automatically processed, automatically calculated, and the result is displayed.
The touch LCD measurement and control system adopts 32-bit ARM technology and DSP high-performance processor control technology. The display part adopts a 7-inch 65K color ultra-clear touch screen with a resolution of 1024*768. The ultra-high performance configuration makes the software function and user experience great improve. The software includes boot animation, main screen display, large curve display, unit setting, multiple test standard selection and result calculation display, equipment status display, hardware parameter setting, equipment calibration, PID parameter setting, custom parameter editing, sample plan Editing, sample size editing, visual printing and other functions, the micro printer supports a variety of models to choose from, and the motor control supports free switching of multiple control methods such as servo, stepping, frequency conversion, and DC (the factory does not need to replace the system, and the standard features).
This test measurement and control system is a high-performance measurement and control instrument designed specifically for electronic testing machines that integrates measurement and control. It can perform tensile, compression, bending, shear, tear, and peel tests. The software can complete the maximum force, maximum deformation, tensile strength, elongation at break, total elongation at maximum force, elongation at yield point, elongation after fracture, upper and lower yield strength, elastic modulus, force at yield point, and elongation at break , Calculation and real-time display of parameters such as elongation at yield point, tensile strength at break, tensile stress at yield point, constant elongation stress, constant elongation (according to user-specified constant force level) and other parameters, among which the level of constant elongation The value and the constant force level value can be entered into the relevant position of the software in the sample parameter interface according to the actual requirements of the customer. The parameters that can be calculated also include compressive strength, upper and lower compression yield strength, compression elastic modulus, bending strength, bending elastic modulus, average bending force, average peel force, peel strength, maximum peel force, minimum peel force, tear strength , Average shear force, shear strength, shear modulus and other mechanical and physical properties related parameters.
Main interface function introduction


ZY-5000N Fabric Geo-bulla Machine
The ZY series tensile machine can be used for cloth geotextile, rubber, plastic, foam material, plastic, film, textile, fiber, polymer material, composite material, synthetic material, packaging tape, paper, wire and cable, fiber optic cable safety belt, leather Belts, shoes, tapes, polymers, spring steel, stainless steel, castings, non-ferrous metals, auto parts alloy materials and other non-metal materials and metal materials are stretched, compressed, bent, teared, 90° peeled, 180° Peel, shear, adhesion, pull-out force, elongation and other tests.
Host specifications
A. High-precision sensor: 5000N, the force accuracy is within ±0.5.
B. Capacity segmentation: Seven gears in the whole process: × 1, × 2, × 5, × 10, × 20, × 50, × 100 using high-precision 24 bits A/D, sampling frequency 200Hz, full force resolution 1/1000, 000
C. Power system: high-precision closed-loop drive motor.
D. Control system: Use Pulse Command control method to make the control more precise. Speed control range 0.001~1000 mm/min. The linkage board adjustment has fast coarse adjustment and slow fine adjustment functions. After the test, it will automatically return to the origin and automatically store.
E. Data transmission method: USB transmission
F. Display mode: UTM107+WIN-XP test software computer screen display.
G. Concise linear double correction system for the first gear and precise seven gears throughout the entire journey.
H. The luxurious test interface software can realize constant speed, positioning shift, constant load (hold time can be set), constant load increase rate, constant stress increase rate, constant strain increase rate and other control modes, plus multi-level control modes can meet different requirements Test requirements.
I. Test space: Test width is about 380mm (standard specification), and the board walking space is 850mm (excluding fixture) (standard specification)
J. Full displacement: Encoder 2500 P/R, 4 times higher accuracy. LINE DRIVE encoder with strong anti-jamming capability. Displacement resolution is 0.001mm. K. Device: overload emergency stop device, upper and lower stroke limit device, leakage automatic power-off system, automatic break point shutdown function.
k. Manual control mode: manual operation box.
Software function:
A. Test standard modularity function: Provide users with the test standard settings required by the application, covering GB, ASTM, DIN, JIS, BS... etc. Test standard specification.
B. Sample data: Provide users with all sample data set by the user, and input data once can be reused. The formula can be modified by itself to improve the fit of test data.
C. Double report editing: open user editing reports, for testers to choose their favorite report format (the test program adds a built-in EXCEL report editing function to extend the previous format of a single report)
D. The length, power unit, and display digits adopt dynamic interchange mode, power unit T, Kg, N, KN, g, lb, deformation unit mm, cm, inch.
E. Automatic Auto Scale of graph curve scale, which can make graph display in proper scale. And can switch dynamically in real-time graphics during testing. With load-displacement, load-time, displacement-time, stress-strain load-2 point extension diagram, and multi-curve comparison.
F. The test result can be output in the form of data in EXCEL format.
G. After the test, it can be automatically archived and manually archived. After the test, the maximum strength, upper and lower yield strength, hysteresis loop method, stepwise approximation method, non-proportional extension strength, tensile strength, compressive strength, and elongation strength at any point can be automatically calculated. , Any point fixed load extension, elastic modulus, elongation, peeling interval maximum, minimum, average, net energy, return energy, total energy, bending modulus, break point displacement x% load, break point load X% Displacement, etc. Data backup: test data can be saved in any hard disk partition.
H. Multiple languages switch randomly: Simplified Chinese, Traditional Chinese, English.
I. The software has a historical test data demonstration function.
The main technical parameters
1. Force resolution: 0.001-0.1N
2. System accuracy: less than ±0.1
3. Maximum test force: 5000N
4. Accuracy level: 0.5
5. Test force measurement range: 1-99%
6. Test force indication error: less than or equal to 0.3%
7. Test force resolution: 0.001
8. Displacement resolution: 0.001
9. Displacement indication error: less than or equal to 0.5%
10. Speed range: 0-500mm/min
11. The maximum stroke of the gripper: 800mm
12. Elongation tracking error: ±0.1mm
13. Power supply voltage: AC220V±10% 50Hz
14. Net weight: 150KG
Software features
Automatic clearing: After the computer controls the test command, the system automatically clears;
High intelligence: After the test, the fracture is automatically judged and the fixture automatically returns to the initial position
Multi-function: different fixtures can


Previous page
1
Next page
Yangzhou Zhengyi Testing Machinery Co., Ltd.
Service Hotline:
Add:
Address: Zhenxing North Road, Zhenwu Town, Jiangdu District, Yangzhou City, Jiangsu Province
Copyright: Yangzhou Zhengyi Testing Machinery Co., Ltd. 苏ICP备14021115号-4 Powered by:www.300.cn


