PRODUCT
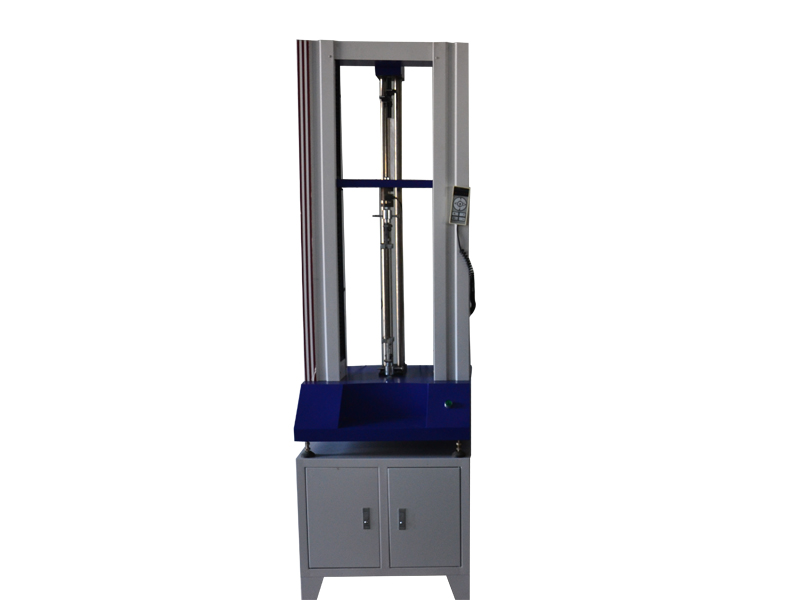
ZY-5000N Digital Display Wire and Cable Tension Machine
ZY series wire and cable tensile machine is an instrument used to test the mechanical properties of materials such as stretching, peeling, tearing, and H extraction. It is widely used in rubber, plastic, textile, chemical, steel wire, hose tape, wire and cable, plastic, pipe and other industries. It is a high-precision, economical and practical instrument.
The tensile machine is composed of a host, a speed control system, data acquisition and processing, sensors and electrical interlocking parts. The host includes the fuselage, transmission mechanism, and measurement system. Data processing is handled by a microcomputer processor. This machine uses a stepping speed regulator to change the stretching speed, and the speed value is directly read out. The motor moves the lower gripper (fixture) through the V-belt-worm-screw drive, so as to realize the tensile change of the sample. The head of the main unit is equipped with a tension sensor, and its upper end is connected with the connecting plate of the top beam of the main unit, and the lower end is connected with the upper clamp. The sensor is only subject to vertical tension and is not affected by torsion or directional force to ensure force measurement accuracy. Between the upper and lower grippers, the force of the sample during the test is transformed into an electrical signal through the force sensor and input into the microcomputer acquisition control system. After the test is over, it is automatically processed, automatically calculated, and the result is displayed.
The touch LCD measurement and control system adopts 32-bit ARM technology and DSP high-performance processor control technology. The display part adopts a 7-inch 65K color ultra-clear touch screen with a resolution of 1024*768. The ultra-high performance configuration makes the software function and user experience great improve. The software includes boot animation, main screen display, large curve display, unit setting, multiple test standard selection and result calculation display, equipment status display, hardware parameter setting, equipment calibration, PID parameter setting, custom parameter editing, sample plan Editing, sample size editing, visual printing and other functions, the micro printer supports a variety of models to choose from, and the motor control supports free switching of multiple control methods such as servo, stepping, frequency conversion, and DC (the factory does not need to replace the system, and the standard features).
This test measurement and control system is a high-performance measurement and control instrument designed specifically for electronic testing machines that integrates measurement and control. It can perform tensile, compression, bending, shear, tear, and peel tests. The software can complete the maximum force, maximum deformation, tensile strength, elongation at break, total elongation at maximum force, elongation at yield point, elongation after fracture, upper and lower yield strength, elastic modulus, force at yield point, and elongation at break , Calculation and real-time display of parameters such as elongation at yield point, tensile strength at break, tensile stress at yield point, constant elongation stress, constant elongation (according to user-specified constant force level) and other parameters, among which the level of constant elongation The value and the constant force level value can be entered into the relevant position of the software in the sample parameter interface according to the actual requirements of the customer. The parameters that can be calculated also include compressive strength, upper and lower compression yield strength, compression elastic modulus, bending strength, bending elastic modulus, average bending force, average peel force, peel strength, maximum peel force, minimum peel force, tear strength , Average shear force, shear strength, shear modulus and other mechanical and physical properties related parameters.
Main interface function introduction


ZY-5000N computer type wire and cable tension machine
ZY series wire and cable tension machine can be used for wire and cable, rubber, plastic, foam material, plastic, film, textile, fiber, polymer material, composite material, synthetic material, packaging tape, paper, wire and cable, fiber optic cable safety belt, Leather belts, shoes, tapes, polymers, spring steel, stainless steel, castings, non-ferrous metals, auto parts alloy materials and other non-metallic materials and metal materials are stretched, compressed, bent, teared, 90° peeled, 180 °Peel, shear, adhesion, pull-out force, elongation and other tests.
Host specifications
A. High-precision sensor: 5000N, the force accuracy is within ±0.5.
B. Capacity segmentation: Seven gears in the whole process: × 1, × 2, × 5, × 10, × 20, × 50, × 100, using high-precision 24 bits A/D, sampling frequency 200Hz, maximum power resolution 1/1000 ,000
C. Power system: high-precision closed-loop drive motor.
D. Control system: Use Pulse Command control method to make the control more precise. Speed control range 0.001~1000 mm/min. The linkage board adjustment has fast coarse adjustment and slow fine adjustment functions. After the test, it will automatically return to the origin and automatically store.
E. Data transmission method: USB transmission
F. Display mode: UTM107+WIN-XP test software computer screen display.
G. Concise linear double correction system for the first gear and precise seven gears throughout the entire journey.
H. The luxurious test interface software can realize constant speed, positioning shift, constant load (hold time can be set), constant load increase rate, constant stress increase rate, constant strain increase rate and other control modes, plus multi-level control modes can meet different requirements Test requirements.
I. Test space: Test width is about 380mm (standard specification), and the board walking space is 850mm (excluding fixture) (standard specification)
J. Full displacement: Encoder 2500 P/R, 4 times higher accuracy. LINE DRIVE encoder with strong anti-jamming capability. Displacement resolution is 0.001mm. K. Device: overload emergency stop device, upper and lower stroke limit device, leakage automatic power-off system, automatic break point shutdown function.
k. Manual control mode: manual operation box.
Software function:
A. Test standard modularity function: Provide users with the test standard settings required by the application, covering GB, ASTM, DIN, JIS, BS... etc. Test standard specification.
B. Sample data: Provide users with all sample data set by the user, and input data once can be reused. The formula can be modified by itself to improve the fit of test data.
C. Double report editing: open user editing reports, for testers to choose their favorite report format (the test program adds a built-in EXCEL report editing function to extend the previous format of a single report)
D. The length, power unit, and display digits adopt dynamic interchange mode, power unit T, Kg, N, KN, g, lb, deformation unit mm, cm, inch.
E. Automatic Auto Scale of graph curve scale, which can make graph display in proper scale. And can switch dynamically in real-time graphics during testing. With load-displacement, load-time, displacement-time, stress-strain load-2 point extension diagram, and multi-curve comparison.
F. The test result can be output in the form of data in EXCEL format.
G. After the test, it can be automatically archived and manually archived. After the test, the maximum strength, upper and lower yield strength, hysteresis loop method, stepwise approximation method, non-proportional extension strength, tensile strength, compressive strength, and elongation strength at any point can be automatically calculated. , Any point fixed load extension, elastic modulus, elongation, peeling interval maximum, minimum, average, net energy, return energy, total energy, bending modulus, break point displacement x% load, break point load X% Displacement, etc. Data backup: test data can be saved in any hard disk partition.
H. Multiple languages switch randomly: Simplified Chinese, Traditional Chinese, English.
I. The software has a historical test data demonstration function.
The main technical parameters
1. Force resolution: 0.001-0.1N
2. System accuracy: less than ±0.1
3. Maximum test force: 5000N
4. Accuracy level: 0.5
5. Test force measurement range: 1-99%
6. Test force indication error: less than or equal to 0.3%
7. Test force resolution: 0.001
8. Displacement resolution: 0.001
9. Displacement indication error: less than or equal to 0.5%
10. Speed range: 0-500mm/min (special requirements can be customized)
11. The maximum stroke of the gripper: 800mm
12. Elongation tracking error: ±0.1mm
13. Power supply voltage: AC220V±10% 50Hz
14. Net weight: 150KG
Software features
Automatic clearing: After the computer controls the test command, the system automatically clears;
High intelligence: After the test, the fracture is automatically judged and the fixture automatically returns t


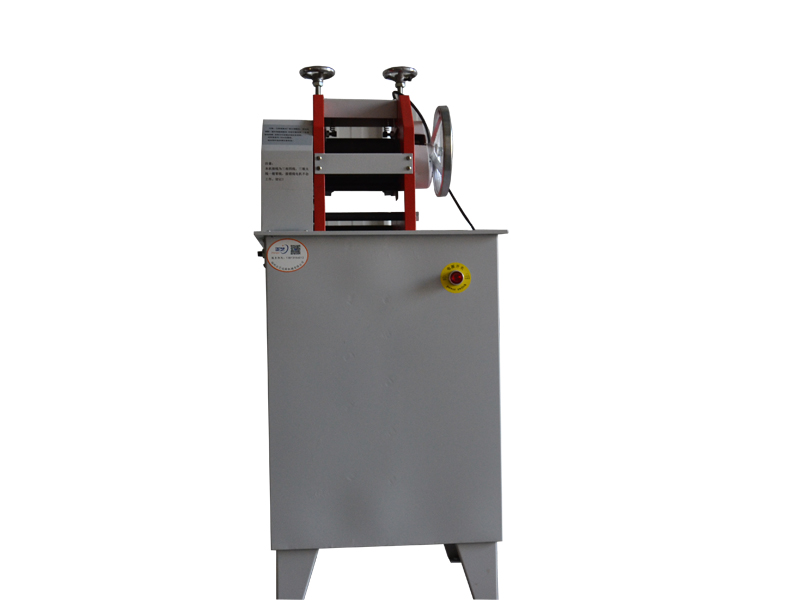
ZY-1008 Wire and cable flaker
ZY-1008 Wire and cable flaker
1. Performance and use
In order to cooperate with inspection agencies at all levels and wire and cable manufacturers to better implement the GB/T529-2008 "General Test Methods for Wires, Cables and Sheath Materials" standard, for polymer insulation and sheath materials in the GB/T529-2008 standard Under the guidance of relevant experts from the Shanghai Cable Research Institute, the new requirements put forward by the mechanical and physical performance tests have developed a cable die chipper (also called a chipper). This machine adopts a series of technologies to enable the blades to be placed horizontally, replaceable and grind, which meets the requirements of the operating principle of the equipment for preparing samples in GB/T529-2008. Test personnel need to carefully read the contents of the relevant chapters of the GB/T529-2008 standard, carefully read the operating instructions of the machine, understand the use of the machine, and master the specific operating steps and precautions in order to prepare high-quality test pieces.
This test slicer is a kind of equipment used for factory testing of rubber and plastic products. It adopts mechanical transmission to feed material and the structure of blade cutting, which can cut various thicknesses of soft plastic, rubber sheet, rubber waterstop within the range of 2-12 mm, and can also be used for slicing some rubber and leather materials. This machine is widely used in rubber, plastic, leather, wire and cable manufacturers, scientific research and other units.
This machine is suitable for matching cables and communication cables specified in the standard GB/T529-2008 "General Test Methods for Wires, Cables and Sheathing Materials", including samples for testing the mechanical and physical properties of the polymer insulating sheath materials of marine cables preparation.
2. Main technical specifications
Worktable width 160mm
The slice width is not more than 100mm (according to different materials, it is recommended that 25-35mm is preferred)
Slice thickness 1-12mm
Feeding thickness ≤20mm
Electric motor Y100-8; 1.1 kW 910 rpm; 380 volts
Dimensions (L×W×H) 460×490×1100mm
Net weight 115 kg
Three, structure and use
This slicer is composed of body, transmission, adjustment, manipulation, etc. The structure and use of each part are introduced as follows:
1. Body and transmission
The lower part of the fuselage is the machine base, the inside is equipped with electric motors and electrical accessories, the outside is equipped with a motor start emergency stop switch, the upper part of the fuselage is the working part, equipped with left and right frames, worktables, compression shafts, feeding shafts and adjustment structures Wait.
When working, start the switch, turn on the motor, the slicer starts to run, and the stop switch stops the slicer.
The transmission is driven by a motor, which drives the transmission shaft to rotate through the main and auxiliary pulleys. The gears installed at both ends of the drive shaft respectively drive the lower and upper feed shafts to rotate, and the gears on the upper feed shaft drive the compression shaft to rotate simultaneously.
2. Manipulation and adjustment
The right-hand operating handwheel is generally used for adjustment. When working, the wheel is idling to adjust the slice thickness. The system rotates the adjustment handwheel above the rack, and the compression shaft and the upper feeding shaft rise (or fall) through the transmission system. To the required slice thickness. The thickness of the handwheel is adjusted to 2 mm per turn.


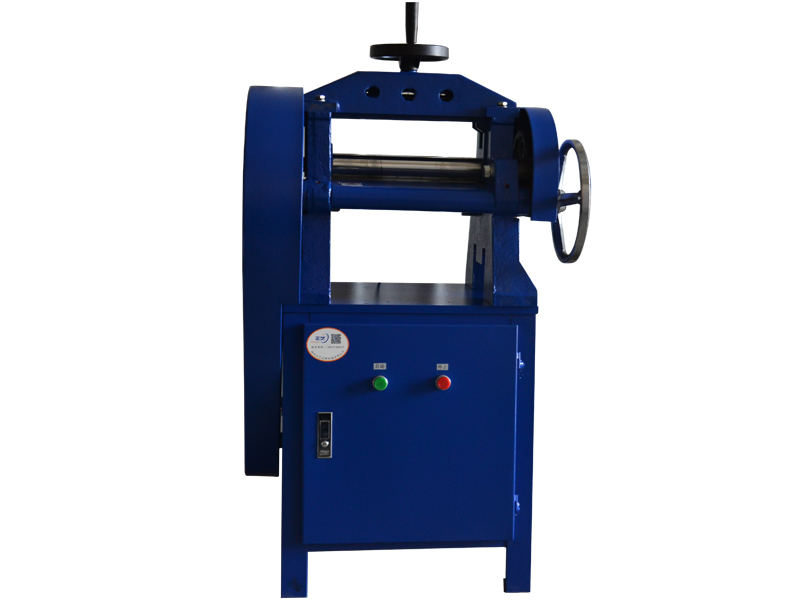
SQ-300 Rubber and Plastic Flaker
1. Performance and use
In order to cooperate with testing institutions at all levels and wire and cable manufacturers to better implement the GB/T2951-2008 "General Test Methods for Cable and Optical Cable Insulation and Sheath Materials" standard, for polymer insulation and sheath materials in the GB/T2951 standard Under the guidance of the relevant experts of the Cable Research Institute, the new requirements put forward by the mechanical and physical performance test, the cable die chipper (also called the chipper) was developed. This machine adopts a series of technologies to enable the blades to be placed horizontally, replaceable and grind, and meet the requirements of the operating principles of the equipment for preparing samples in GB/T 2951 and 2941. The user needs to read the manual of the machine carefully, understand the use method of the machine, master the specific operation steps and precautions, in order to be able to prepare high-quality test pieces.
This test slicer is a kind of equipment used for sampling in rubber and plastic products factories. It adopts mechanical transmission to feed material and the structure of blade cutting, which can cut various thicknesses of soft plastic, rubber sheet and rubber waterstop within the range of 1-12 mm, and can also be used for slicing some rubber and leather materials. This machine is widely used in rubber, soft plastic, leather, wire and cable manufacturers, scientific research and other units.
This machine is suitable for the matching cables and communication cables specified in the standard GB/T2951-2008 "General Test Methods for Wires, Cables and Sheath Materials", including samples for the mechanical and physical performance testing of polymer insulating sheath materials of marine cables preparation. Meet GB/T2941-2006 "Rubber Physical Sample Method, General Procedure for Sample Preparation and Adjustment".
2. Main technical specifications
Worktable width 300mm
The slice width is not more than 100mm (according to different materials, it is recommended that 25-35mm is preferred)
Slice thickness 1-12mm
Feeding thickness is not more than 20mm
Working voltage 380V
Dimensions L×W×H 500×500×1340mm
Net weight 215 kg
Three, structure and use
This slicer is composed of body, transmission, adjustment, manipulation, etc. The structure and use of each part are introduced as follows:
1. Body and transmission
The lower part of the fuselage is the machine base, the inside is equipped with electric motors and electrical accessories, the outside is equipped with motor start and stop switches, the upper part of the fuselage is the working part, equipped with left and right frames, worktables, compression shafts, feeding shafts and adjustment structures Wait.
When working, start the switch, turn on the motor, the slicer starts to run, and the stop switch stops the slicer.
The transmission is driven by a motor, which drives the transmission shaft to rotate through the main and auxiliary pulleys. The gears installed at both ends of the drive shaft respectively drive the lower and upper feed shafts to rotate, and the gears on the upper feed shaft drive the compression shaft to rotate simultaneously.
2. Manipulation and adjustment
The top operating handwheel is generally used for adjustment. This wheel is idling during work. The slice thickness is adjusted by rotating the adjustment handwheel above the frame to drive the compression shaft of the transmission system and the upper feeding shaft to rise (or fall) to the position The required slice thickness. The thickness of the handwheel is adjusted to 2 mm per turn.


401-B hot air aging test box
401-B aging box
1. Features and uses:
This test box is used for thermal oxygen aging test of rubber, plastic, wire and cable, electrical insulation materials and other materials. Digital display temperature control can be used for hot air aging test of rubber and plastic products, electrical insulation and other materials. The temperature control adopts digital display and PID automatic temperature controller. The working temperature can be set from room temperature to 300℃, automatic Constant temperature, vertical natural ventilation, rapid aging test under constant temperature conditions. The structure of the main engine, the instrumentation and the materials are designed after detailed research on the airflow and temperature in the box. Long-term use has proved that it has the advantages of sensitive temperature control, good temperature uniformity, large effective space and stable performance. There are observation holes.
2. Technical parameters:
1. Power supply voltage: AC 220V 50HZ
2. Rated power: 3000W
3. Working temperature: <300℃
4. Temperature fluctuation: ≤±2℃
5. Temperature uniformity: ≤±2℃
6. Air exchange rate: 8-20 times/h
7. Studio size: 450×450×500mm


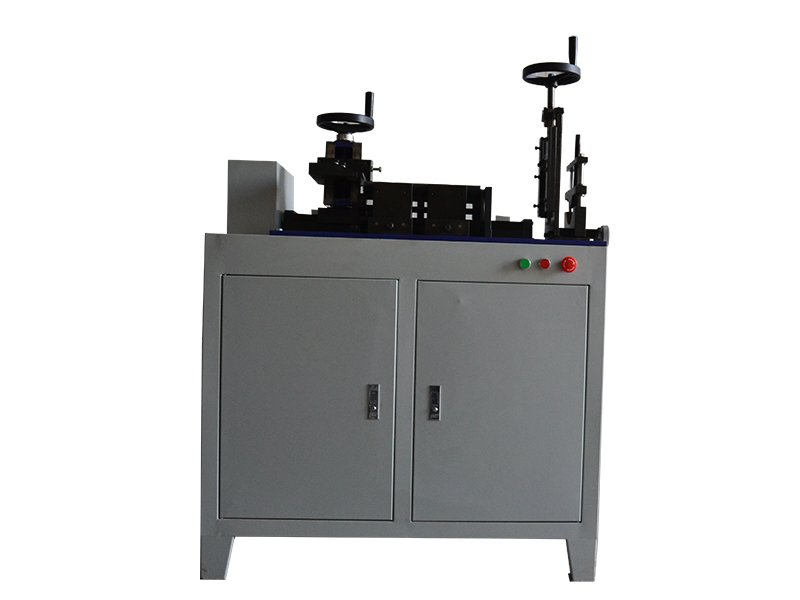
ZY-2001HZ cross-linked cable slicing machine (cross cutting + longitudinal cutting)
ZY-2001HZ cross-linked cable slicing machine (cross cutting + longitudinal cutting)
1. Purpose
The ZY-2001 type cross-linked cable slicer is dedicated to the sampling of the physical performance test of cross-linked polyethylene and polyethylene plastic insulated power cables. Its characteristic is to change the traditional rotary transverse slice into a translational transverse slice, and to increase the The improvement of longitudinal slicing greatly improves the reliability of test results and reduces the dispersion of test results.
2. Main technical parameters
1. Input voltage: 380 volts
2. Power: 1.1 kW
3. Transverse cutting stroke: 550 mm
4. Transverse slice thickness: 0.2~2mm (adjustable)
5. Clamping diameter of transverse section specimen: φ18~φ150mm
6. Arbitrary adjustment of longitudinal slice thickness (thin 0.1 millimeters)
7. Clamping diameter of longitudinal section specimen: φ25~φ90mm
8. Dimensions: 1030×520×1260 mm
Three, working principle
1. Horizontal slice
The motor, V-belt wheel and screw drive the tool holder to move back and forth. The knife holder is equipped with a transverse cutter. According to the thickness of the sample slice to be cut, the knife holder is raised and lowered, and the distance between the transverse slice and the sample is adjusted. The knife holder moves horizontally to cut the transverse slice of the required thickness.
2. Longitudinal slice
Press the sample by rotating the upper screw rod, and then rotate the lower screw rod to feed the sample to the required cutting thickness, and then rotate the hand wheel to make the ball screw drive the longitudinal cutter to slice longitudinally.


ZY-2002 Wire Winding and Torsion Testing Machine
ZY-2002 Wire Winding and Torsion Testing Machine
1. Overview of the main unit of the wire winding and torsion testing machine
The wire winding and torsion testing machine is applicable to the standards of GB4909.4-2009 "Bare Wire Test Method and Torsion Test" and GB4909.7-2009 "Bare Wire Test Method and Winding Test" standards, used for aluminum wire, steel wire, copper rod When performing winding and torsion tests. It is a necessary inspection tool for steel core aluminum stranded wire manufacturers.
2. Main technical parameters:
Torsion: 1. Dimensions: 1440mm×390mm×1080mm
2. Input voltage: 380V
3. Input power: 1.5KW
4. The adjustable range of torsion: 10 rpm, 30 rpm, 60 rpm
5. Torsion range: (1) Copper rod: ¢1-12mm
(2) Aluminum rod: ¢1-16mm
(3) Steel wire: ¢1-4mm
Winding: 1. Test diameter: Aluminum wire: ¢1.25mm-¢6.0mm
Steel wire: ¢0.1mm-¢3.8mm
Copper wire: ¢0.1mm-¢10.0mm
2. Core rod diameter: ¢1.25mm-¢19mm
3. Displacement distance of right shaft head: ≥40
4. Spindle speed: 10 rpm
Three, sample collection
According to the requirements of GB4909.4-2009, there should be no mechanical damage on the sample surface, and the sample should be calibrated.
Sample length = effective length + clamping length
Effective length: Determined according to sample diameter and standard.
Clamping length: the clamping length of two chucks, generally about 60~70mm


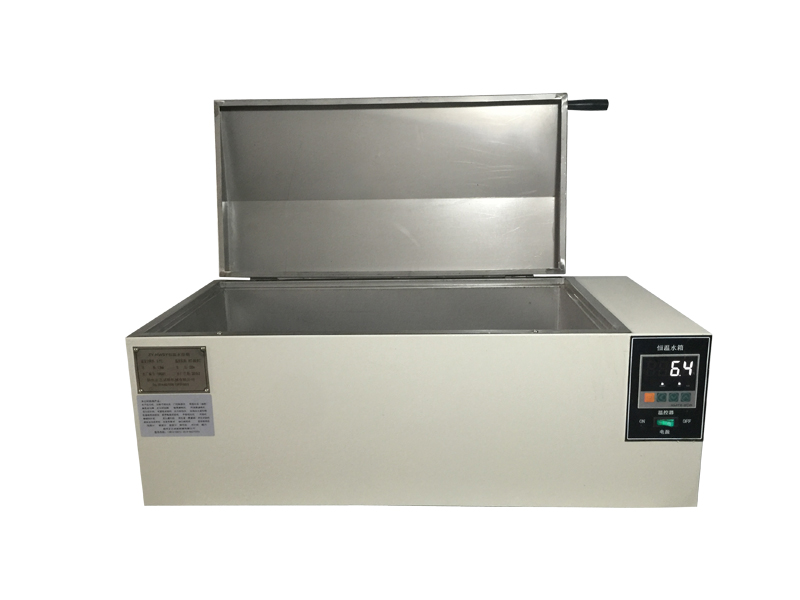
ZY-HWSY constant temperature water bath
This constant temperature water tank studio water tank is made of high-quality stainless steel, which has superior corrosion resistance. The cold plate of the shell is electrostatically sprayed, which is beautiful and elegant; intelligent instrument microcomputer temperature control, accurate PID temperature control, digital display, automatic temperature control; easy operation and safe use . This water tank is often used to test the insulation resistance value and withstand voltage value of wires and cables in water, and is used with insulation resistance testers and withstand voltage tests. Comply with VDE, UL, GB and other standards.


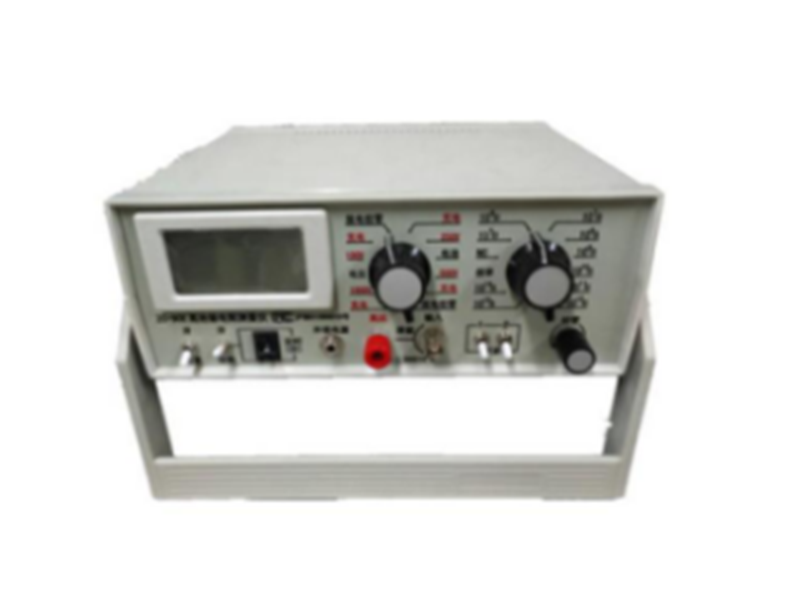
ZC-90E high insulation resistance measuring instrument (digital high resistance meter)
Optional accessories: electrode box (three electrodes), electrostatic electrode (weight hammer), liquid electrode, etc.
——Test voltage: 100V, 250V, 500V, 1000V
——Resistance range: 0-2×10¹⁶ Ω
——Resolution: 1000Ω
--Features:


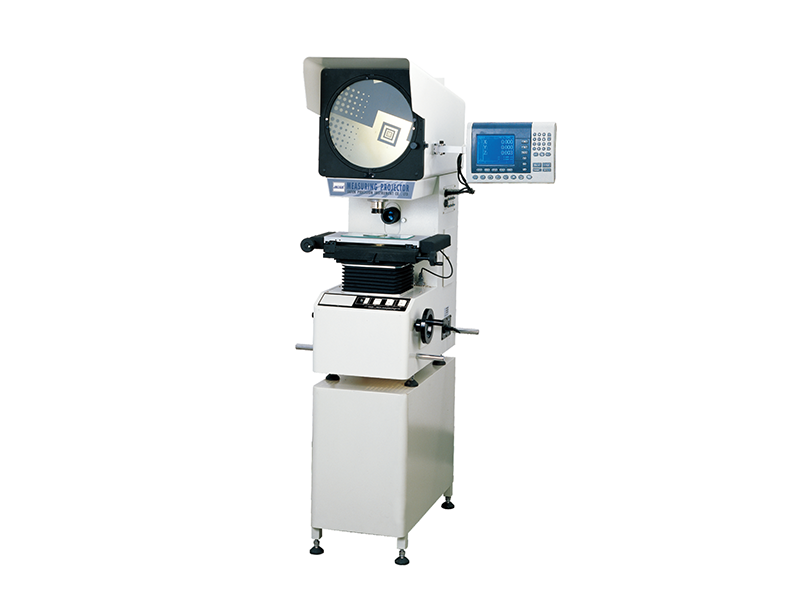
Digital display projector
This instrument is a vertical projector developed by our company. It has the following characteristics:
●ZY-3000 series digital measuring projector is a precision measuring instrument integrating light, machine and electricity. It is widely used in machinery, instrumentation, electronics, light industry and other industries; colleges, research institutes and metrological verification departments.


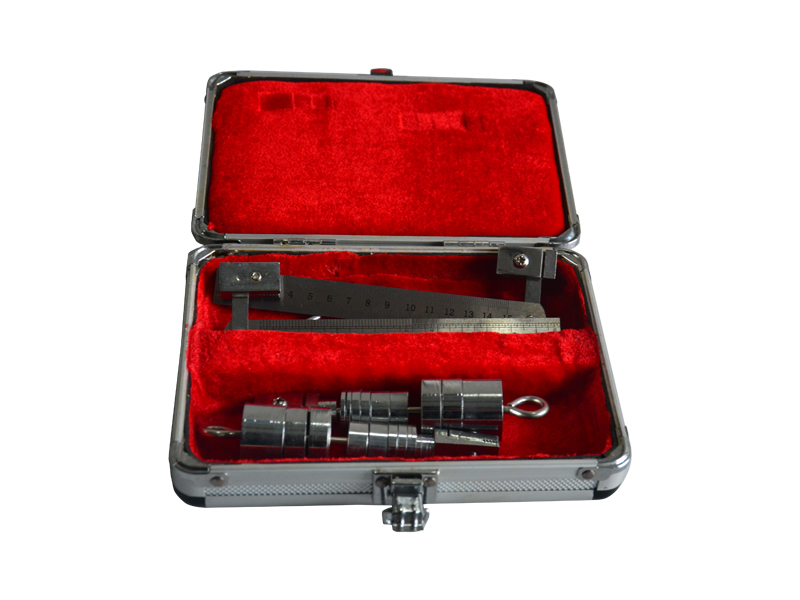
Thermal extension device
1. Test standard
It conforms to the GB/T2951-2008 standard and other clauses GB5013-2008 that require the device, and needs to be used in conjunction with the 401 aging test chamber.
1. Weights: 1, 2, 5, 10, 20, 50g, 100g
2. 150mm stainless steel ruler
3. Material: stainless steel
4. Weight: about 2kg
2. Sampling
Sample preparation and measurement of cross-sectional area Cut two insulation samples and sheath samples from each sample to be tested, prepare the sample and measure the cross-sectional area according to the test method specified in Chapter 9 of GB/T2951.1 experimenting.
The dumbbell test piece shall be made from the inner layer of the insulation and sheath after removing all ridges and or semi-conductive layers.
The thickness of the test piece shall be no less than 0.8mm and no more than 2.0mm. If a 0.8mm thick test piece cannot be prepared, the minimum thickness is allowed to be 0.6mm.
3. Test equipment
a) The test should be carried out in an oven as specified in Article 8.1 of GB/T2951.2-1997. The test temperature is in accordance with the relevant material specifications in the relevant cable product standards.
b) In the oven, each test piece should be hung from the upper chuck, clamped by the lower chuck, and weighted on the lower chuck.
Note: When fixing the tubular test piece with the chuck, the two ends of the test piece should not be tightly closed. It can be achieved by appropriate methods, such as inserting a small piece of metal needle tube into one end of the test piece, the size of which is slightly smaller than the inner diameter of the test piece.
Four, test steps
a) The test piece should be hung in the oven, and the lower chuck should add weight. The resulting force is in accordance with the relevant cable product standards for related materials.
b) After 15 minutes in the oven, measure the distance between the marking lines and calculate the elongation. If the oven has no observation window and the door must be opened for measurement, the measurement should be completed within 30s after opening the door. The temperature of the oven is in accordance with the regulations of the relevant cable product standards for the relevant materials. In case of dispute, the test should be carried out in an oven with an observation window, and the door of the oven should not be opened for measurement.
c) Then release the tension from the specimen (cut the specimen at the lower chuck), and restore the specimen at the specified temperature for 5 minutes. Then take the test piece out of the oven, slowly cool it to room temperature, and measure the distance between the marking lines again.
5. Evaluation of test results
After 15 minutes of load at the specified temperature, the median value of elongation should not be greater than the relevant cable product standards.
The median value of the increase in the distance between the marked lines after the test piece is taken out of the oven and cooled to the percentage of the distance before the test piece is placed in the oven should not be greater than the relevant cable product standard.


Previous page
1
Next page
Yangzhou Zhengyi Testing Machinery Co., Ltd.
Service Hotline:
Add:
Address: Zhenxing North Road, Zhenwu Town, Jiangdu District, Yangzhou City, Jiangsu Province
Copyright: Yangzhou Zhengyi Testing Machinery Co., Ltd. 苏ICP备14021115号-4 Powered by:www.300.cn


