PRODUCT
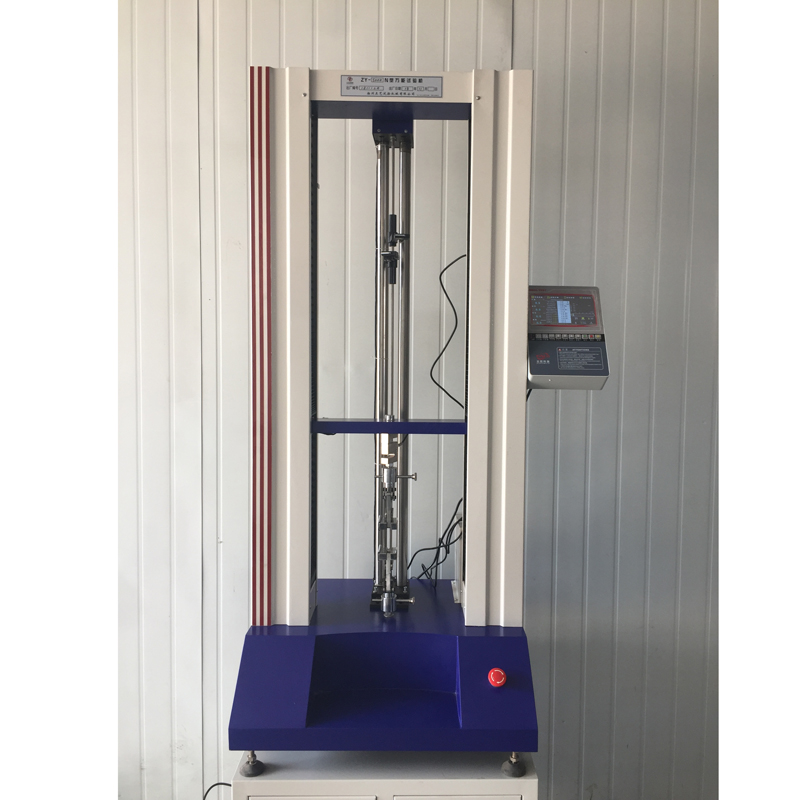
ZY-5000N plastic electronic tensile machine (double column digital display)
ZY-5000N plastic electronic tensile machine is an instrument used to test the mechanical properties of materials such as stretching, peeling, tearing, and H extraction. It is widely used in rubber, plastic, textile, chemical, steel wire, hose tape, wire and cable, plastic, pipe and other industries. It is a high-precision, economical and practical instrument.


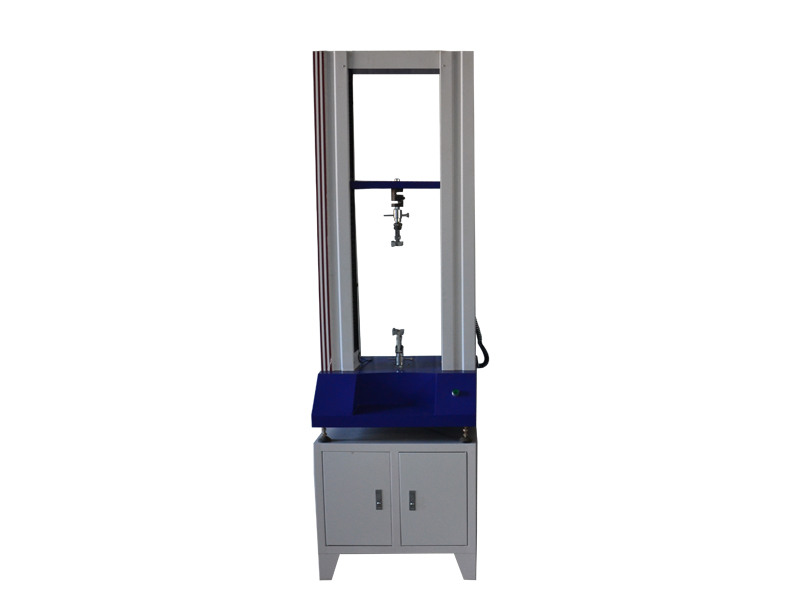
ZY-5000N plastic electronic tensile machine (double column computer)
ZY-5000N plastic electronic tensile machine can be used for rubber, plastic, foam material, plastic, film, textile, fiber, polymer material, composite material, synthetic material, packaging tape, paper, wire and cable, fiber optic cable, safety belt, leather Belts, shoes, tapes, polymers, spring steel, stainless steel, castings, non-ferrous metals, auto parts alloy materials and other non-metal materials and metal materials are stretched, compressed, bent, teared, 90° peeled, 180° Peel, shear, adhesion, pull-out force, elongation and other tests.


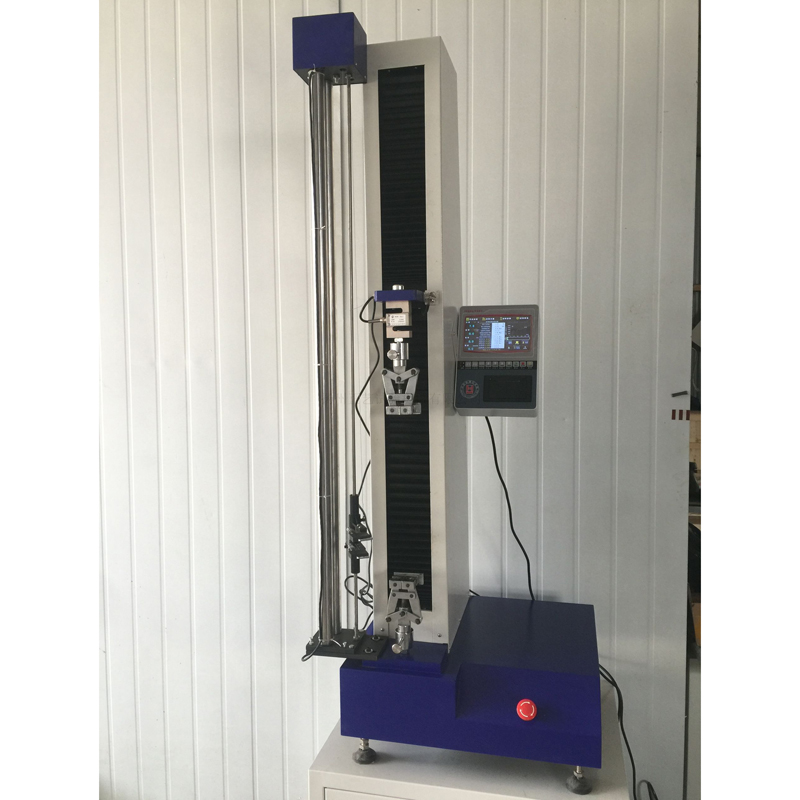
ZY-5000N plastic electronic tensile machine (single-column digital display)
ZY-5000N plastic electronic tensile machine is an instrument used to test the mechanical properties of materials such as stretching, peeling, tearing, and H extraction. It is widely used in rubber, plastic, textile, chemical, steel wire, hose tape, wire and cable, plastic, pipe and other industries. It is a high-precision, economical and practical instrument.


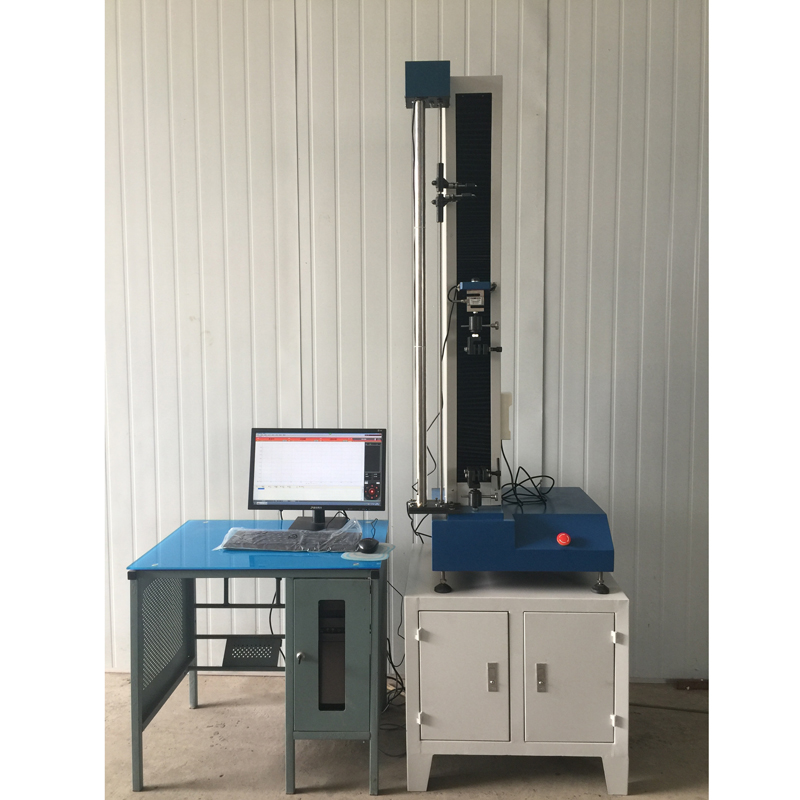
ZY-5000N plastic electronic tensile machine (single column computer)
ZY-5000N plastic electronic tensile machine (single column computer)
ZY-5000N plastic electronic tensile machine can be used for rubber, plastic, foam material, plastic, film, textile, fiber, polymer material, composite material, synthetic material, packaging tape, paper, wire and cable, fiber optic cable, safety belt, leather Belts, shoes, tapes, polymers, spring steel, stainless steel, castings, non-ferrous metals, auto parts alloy materials and other non-metal materials and metal materials are stretched, compressed, bent, teared, 90° peeled, 180° Peel, shear, adhesion, pull-out force, elongation and other tests.
Host specifications
A. High-precision sensor: 5000N, the force accuracy is within ±0.5.
B. Capacity segmentation: Seven gears in the whole process: × 1, × 2, × 5, × 10, × 20, × 50, × 100, using high-precision 24 bits A/D, sampling frequency 200Hz, maximum power resolution 1/1000 ,000
C. Power system: high-precision closed-loop drive motor.
D. Control system: Use Pulse Command control method to make the control more precise. Speed control range 0.001~1000 mm/min. The linkage board adjustment has fast coarse adjustment and slow fine adjustment functions. After the test, it will automatically return to the origin and automatically store.
E. Data transmission method: USB transmission
F. Display mode: UTM107+WIN-XP test software computer screen display.
G. Concise linear double correction system for the first gear and precise seven gears throughout the entire journey.
H. The luxurious test interface software can realize constant speed, positioning shift, constant load (hold time can be set), constant load increase rate, constant stress increase rate, constant strain increase rate and other control modes, plus multi-level control modes can meet different requirements Test requirements.
I. Test space: Test width is about 380mm (standard specification), and the board walking space is 850mm (excluding fixture) (standard specification)
J. Full displacement: Encoder 2500 P/R, 4 times accuracy adopts LINE DRIVE encoder with strong anti-interference ability, displacement resolution is 0.001mm. K. Device: overload emergency stop device, upper and lower stroke limit device, leakage automatic power-off system, automatic break point shutdown function.
k. Manual control mode: manual operation box.
Software function:
A. Test standard modularity function: Provide users with the test standard settings required by the application, covering GB, ASTM, DIN, JIS, BS... etc. Test standard specification.
B. Sample data: Provide users with all sample data set by the user, and input the data once and use it repeatedly. The formula can be modified by itself to improve the fit of test data.
C. Double report editing: open user editing reports, for testers to choose their favorite report format (the test program adds a built-in EXCEL report editing function to extend the previous format of a single report)
D. The length, power unit, and display digits adopt dynamic interchange mode, power unit T, Kg, N, KN, g, lb, deformation unit mm, cm, inch.
E. Automatic Auto Scale of graph curve scale, which can make graph display in proper scale. And can switch dynamically in real-time graphics during testing. With load-displacement, load-time, displacement-time, stress-strain load-2 point extension diagram, and multi-curve comparison.
F. The test result can be output in the form of data in EXCEL format.
G. After the test, it can be automatically archived and manually archived. After the test, the maximum strength, upper and lower yield strength, hysteresis loop method, stepwise approximation method, non-proportional extension strength, tensile strength, compressive strength, and elongation strength at any point can be automatically calculated. , Any point fixed load extension, elastic modulus, elongation, peeling interval maximum, minimum, average, net energy, return energy, total energy, bending modulus, break point displacement x% load, break point load X% Displacement, etc. Data backup: test data can be saved in any hard disk partition.
H. Multiple languages switch randomly: Simplified Chinese, Traditional Chinese, English.
I. The software has a historical test data demonstration function.
The main technical parameters
1. Force resolution: 0.001-0.1N
2. System accuracy: less than ±0.1
3. Maximum test force: 5000N
4. Accuracy level: 0.5
5. Test force measurement range: 1-99%
6. Test force indication error: less than or equal to 0.3%
7. Test force resolution: 0.001
8. Displacement resolution: 0.001
9. Displacement indication error: less than or equal to 0.5%
10. Speed range: 0-500mm/min (special requirements can be customized)
11. The maximum stroke of the gripper: 800mm
12. Elongation tracking error: ±0.1mm
13. Power supply voltage: AC220V±10% 50Hz
14. Net weight: 150KG
Features
Automatic clearing: After the computer controls the test command, the system automatically clears;
High intelligence: After the test, the fractur


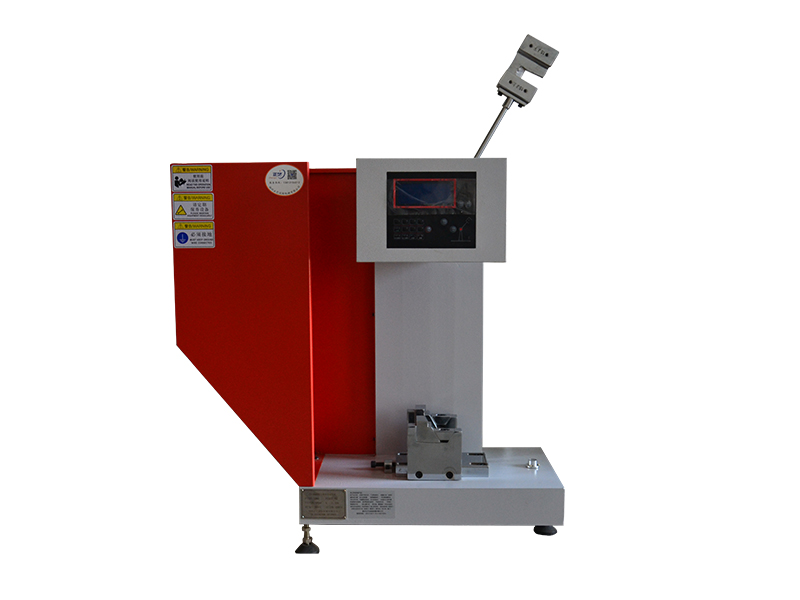
ZY-3002 Simply Supported Beam Impact Testing Machine (5J)
ZY-3002 This equipment is mainly used for the determination of the impact toughness of non-metallic materials such as hard plastics (including plates, pipes, plastic materials), reinforced nylon, glass fiber reinforced plastics, ceramics, cast stones, and electrical insulating materials. The main technical parameters of this impact testing machine meet the requirements of ISO179, GB/T1043, GB/T2611, JB/T8762 and other standards. Intuitive display, simple structure, convenient operation and accurate data are the characteristics of this testing machine.


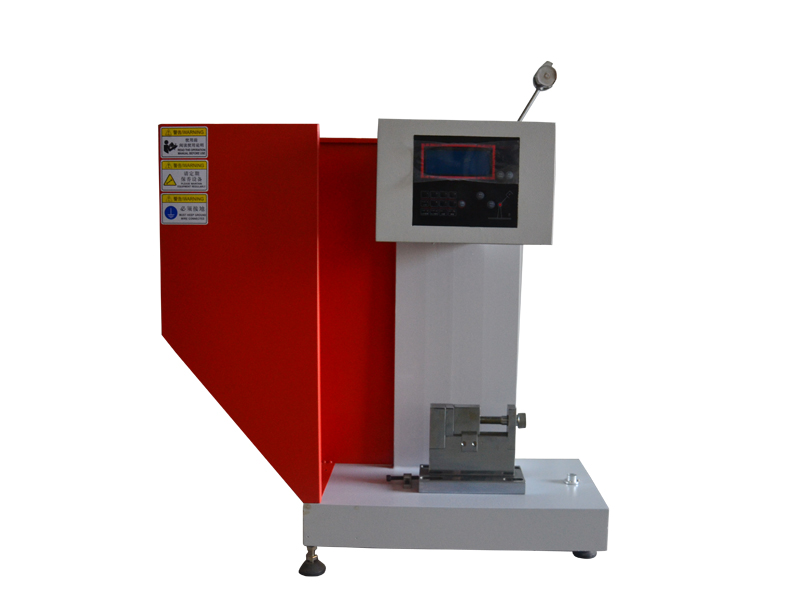
ZY-3002 Simply Supported Beam Impact Testing Machine
ZY-3002 This equipment is mainly used for the determination of the impact toughness of non-metallic materials such as hard plastics (including plates, pipes, plastic materials), reinforced nylon, glass fiber reinforced plastics, ceramics, cast stones, and electrical insulating materials. The main technical parameters of this impact testing machine meet the requirements of ISO179, GB/T1043, GB/T2611, JB/T8762 and other standards. Intuitive display, simple structure, convenient operation and accurate data are the characteristics of this testing machine.


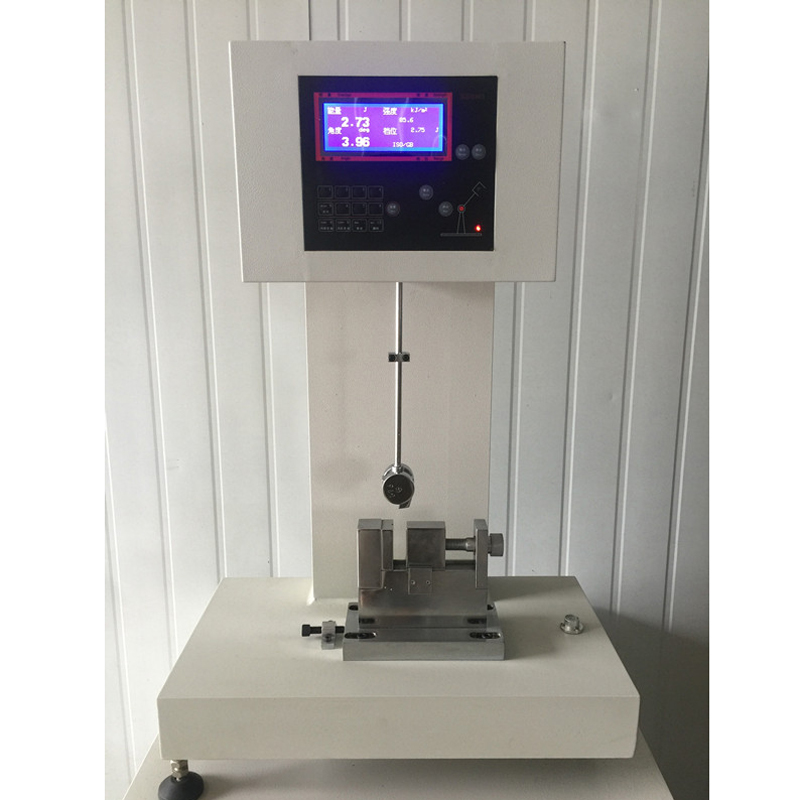
ZY-3003 cantilever beam impact testing machine
The ZY-3003 digital display cantilever beam impact tester is mainly used for the determination of the impact toughness of non-metallic materials such as hard plastics (including plates, pipes, and plastic materials), reinforced nylon, glass fiber reinforced plastics, ceramics, cast stones, and electrical insulating materials. . It is an ideal test equipment for the chemical industry, scientific research institutions, universities and colleges for material performance testing.


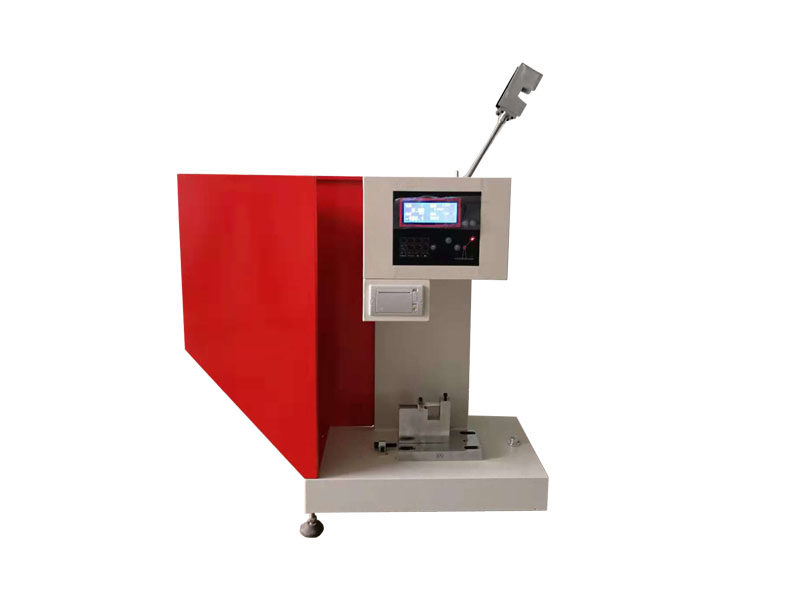
ZY-3000 Simple Suspension Integrated Impact Testing Machine
ZY series simple suspension integrated impact tester is mainly used for the determination of the impact toughness of non-metallic materials such as hard plastics (including plates, pipes, and plastic materials), reinforced nylon, glass fiber reinforced plastic, ceramics, cast stone, and electrical insulation materials. The main technical parameters of this impact testing machine meet the requirements of ISO179, GB/T1043, GB/T2611, JB/T8762, ISO180, GB/T1843, JB/T8761 and other standards. Intuitive display, simple structure, convenient operation and accurate data are the characteristics of this testing machine.


ZY-3000 Tensile Impact Testing Machine
ZY-3000 Tensile Impact Testing Machine
1. Purpose:
It is mainly used to determine the energy required to break the plastic sample under the specified tensile impact speed. Used to determine the brittleness and toughness of non-metallic materials such as plastics.
Meet the standard: GB/T 13525-92 "Plastic Tensile Impact Test Method"
Term: Tensile impact strength: the ratio of the impact energy consumed by the sample being damaged by the tensile impact force to the cross section of the sample before the test KJ/m2
Elongation at break: The rate of change of the gauge length measured by the splicing of the broken part relative to the original gauge length (%)
2. Technical parameters:
1) Impact speed: 3.8m/s
2) Impact energy: 15J, 25J optional
3) Pendulum moment: pd15J=8.03848Nm
pd25J=13.39746Nm
4) Pre-lift angle of pendulum: 150°
5) Strike center distance: 395mm
6) Operating temperature: (15~35)℃
7) Sample size:
Length 80±2mm Width 15±0.5mm Thickness <4mm
Maximum length between fixtures: 30±2mm
8) Power supply: 220VAC-15%~220VAC 10% 50HZ (single-phase three-wire system)
3. Working principle:
One end of the sample is fixed on the fixture of the pendulum impact testing machine, and the other end is fixed on the T-shaped head. The single-way swing of the pendulum provides energy and impacts the T-shaped head, causing the sample to break at a higher tensile deformation rate. The head and part of the sample are thrown out together, the energy consumed by the pendulum and the gauge length before and after the sample is measured are measured. After correction, the tensile impact strength and elongation at break of the sample are calculated. The test results of different types or sizes of samples cannot be compared.
4. Test device:
1. The pendulum of the testing machine must be a rigid pendulum. For a 2mm thick sample, the physical collision center of the pendulum must coincide with the thickness center of the sample during impact.
2. The gripper of the testing machine must not cause the sample to be broken and slide during the test. The gripper can have file-like teeth, and the size of the teeth may vary from sample to sample.
3. The T-shaped head should be made of light-weight and extremely low-elastic materials, and no plastic deformation should occur when impacted.
5. Sample:
The sample is made by injection molding or machining. Film or sheet samples can be cut with a punching knife. During the sample preparation process, the sample shall not overheat. If the coolant is used in machining, it should not affect the performance of the sample. The sample should have no damage on the surface, no internal defects, and uniform thickness. The marking of the sample gauge length shall not affect the performance of the sample. Hard material samples must not be twisted. If the tested material exhibits different tensile impact properties in various directions, samples should be taken in different directions.
Sample shape and size: 1mm is preferred for sample thickness. The sample cut from the product should retain the original thickness; the sample with a thickness greater than 4mm should be machined to 4mm. For very thin films, multiple samples can be used, but they should overlap well.
Number of samples: no less than 5 samples or according to product standards.
Choose a suitable pendulum to make the impact energy reading within the effective range of the testing machine, refer to the following table:
(On the premise that the sample can be clamped, try to choose a small T-shaped head)
Pendulum impact energy J T-shaped head mass g
15.0 30±1 or 60±1
25.0 60±1 or 120±1
Calculation and presentation of test results:
1. Calculation of tensile impact strength:
Where: E—tensile impact strength, KJ/m2
W—the energy consumed by the destruction of the corrected sample, J
d—The thickness of the sample, in millimeters (mm)
h—The width of the sample, in millimeters (mm)
The test results are expressed as the arithmetic average of the tensile impact strength of each group of samples, with 3 significant figures.
2. Energy correction
Since the energy consumed by the pendulum impacting the sample Ws includes the energy consumed by the T-shaped head flying out, the energy must be corrected to find the energy consumed by the damage of the sample.
The energy consumed by the corrected sample destruction W is calculated as follows:
In the formula: W—energy consumed by the destruction of the corrected sample, J
W′—the energy consumed by the destruction of the sample during elastic collision, J
W″—the energy consumed by the failure of the specimen during inelastic collision, J


ZY-3006 drop hammer impact testing machine
ZY-3006 drop hammer impact testing machine
The drop hammer impact tester is suitable for the determination of the impact toughness of various pipes (such as: water supply pipes, drain pipes, low-pressure water pipes, core foam pipes, polypropylene (pp) pipes, plastic pipes for communication pipes, etc.). It is also suitable for hard plastic plates.
The product meets the technical requirements of the industry standard JB/T9389 falling weight impact testing machine, and meets the test method standard requirements of GB/T5836.1, GB/T10002.1, GB/T10002.3, GB/T16800, GB6112, ISO4422, etc.
Technical Parameters
1. Weight of hammer body: 0.25~15.0kg
2. Hammer radius: R5mm, R10mm, R25mm, R30mm, R50mm or customized as required
3, sample diameter: 10mm~400mm
4. Impact height: 0mm~2000mm
5, net weight: 280kg
6. Pallet type: 120°V type or flat pallet with support and clamp
7, electric source: AC220V 50Hz
8. Dimensions: 750mm×550mm×3500mm
9. Workbench stroke: 0mm~400mm
10. Deviation between impact center and fixture center: ≤2mm


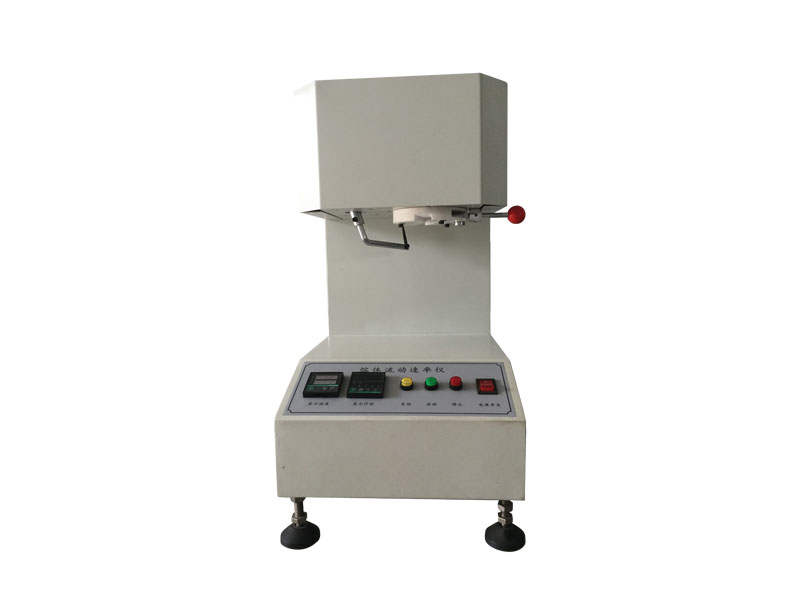
ZY-3004S melt flow rate meter
1.1 Main purpose and scope of application
This instrument is suitable for GB3682-2000 "Determination of Mass Flow Rate of Thermoplastic Melt"
This instrument is used to determine the melt flow rate of various polymers in viscous flow state. It is not only suitable for engineering plastics such as polycarbonate, polyarylsulfone, fluoroplastics, nylon, etc., with higher melting temperature, but also suitable for polyethylene, Tests on plastics with low melting temperature such as polystyrene, polypropylene, ABS resin, and polyoxymethylene resin. It is widely used in plastic production, plastic products, petrochemical industries and related universities, research institutes and commodity inspection departments.


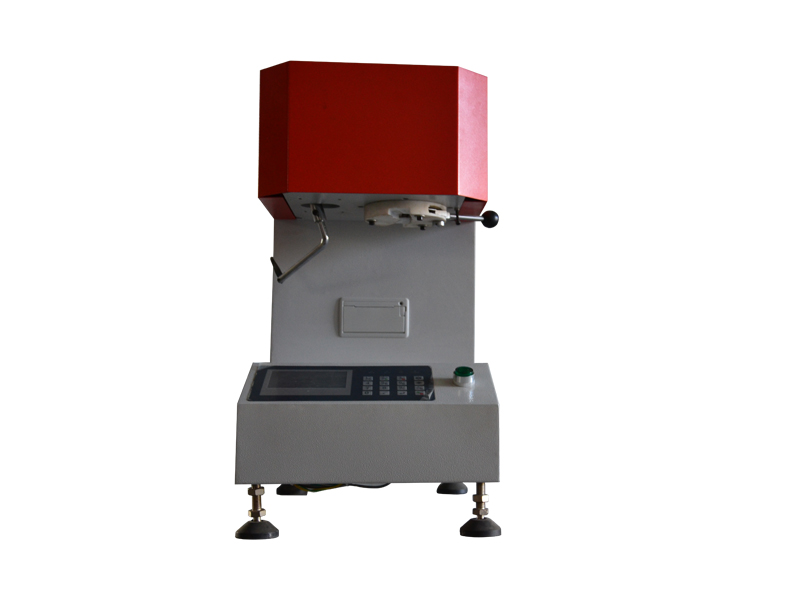
ZY-3004Y melt flow rate meter
This melt flow rate meter is used to determine the melt flow rate of various polymers in a viscous flow state. It is not only suitable for engineering plastics such as polycarbonate, polyarylsulfone, fluoroplastics, etc., with higher melting temperatures, but also It is used for testing materials with low melting temperature, such as polyethylene, polystyrene, polypropylene, ABS resin, and polyoxymethylene resin. It is widely used in plastic production, plastic products, petrochemical industries and related universities, scientific research units and commodity inspection departments. .


ZY-3004G high melting value melt flow rate meter
This melt flow rate meter is used to measure the melt flow rate of various polymers in a viscous flow state. It is not only suitable for engineering plastics such as polycarbonate, polyarylsulfone, fluoroplastics, etc., with higher melting temperatures, but also It can be used to test materials with low melting temperature, such as polyethylene, polystyrene, polypropylene, ABS resin, and polyoxymethylene resin. It can also measure meltblown materials with high melting index. It is widely used in plastic production, plastic products, petrochemical industries, and related colleges, scientific research units and commodity inspection departments.


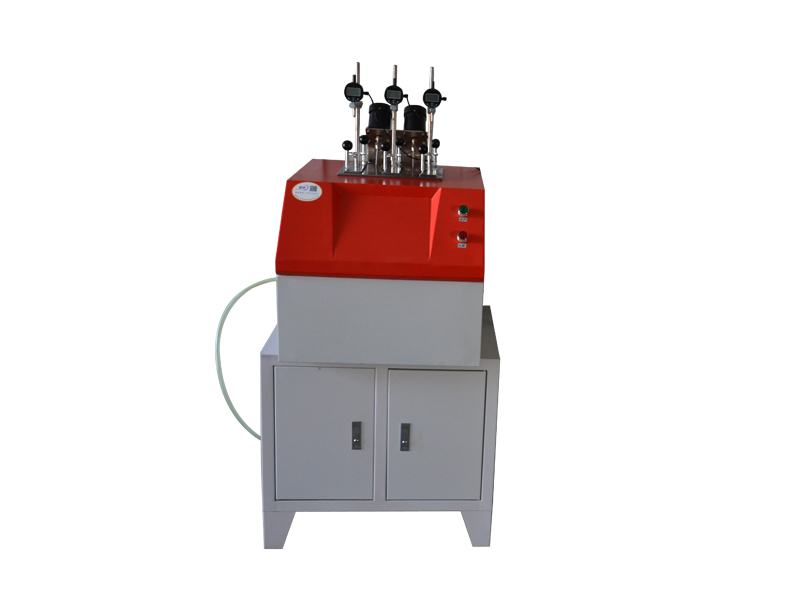
ZY-3001 Thermal Deformation Vicat Temperature Tester
ZY-3001 Thermal Deformation Vicat Temperature Tester uses PLC programmable controller for temperature adjustment and calculator display operation. The product is simple to operate, easy to use, stable in performance, and high in product accuracy. It can monitor the test temperature and deformation in real time during the test; the system automatically stops heating when the test is over, and can print test reports and test curves. This series of models is an indispensable instrument for the self-inspection of quality inspection units, universities and enterprises.


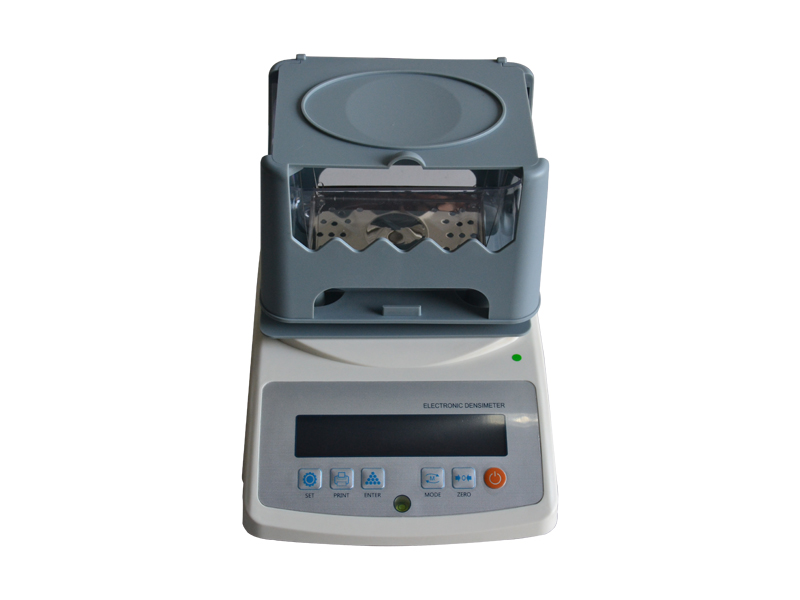
ZY-300A electronic density meter
Product introduction:
The solid density meter is a solid density measuring instrument, using imported sensors, with high accuracy and good repeatability. It can quickly and conveniently measure the density of solids of various shapes, equipped with special measuring accessories, and integrally formed a transparent sink. Easy to carry, simple to operate and powerful!


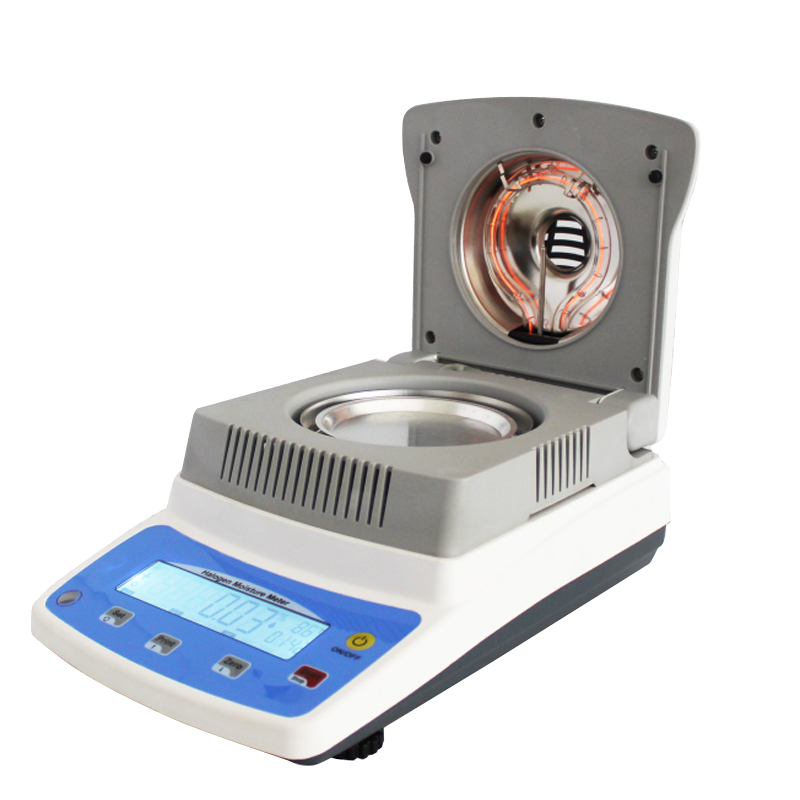
ZYSFY-120A High-precision Halogen Fast Moisture Analyzer
ZYSFY-120A High-precision Halogen Fast Moisture Analyzer
The halogen moisture meter is a new type of rapid moisture tester. It adopts ring-shaped halogen lamp heating, intelligent operation. The sample can be dried quickly and uniformly, and accurate moisture measurement results can be obtained. Clear moisture measurement information display can realize intuitive, simple and convenient instrument operation
Use range:
The moisture meter can be widely used in all industries that need to quickly determine moisture to meet the application requirements of various industries, such as plastic, rubber, chemical, pharmaceutical, food, and other industries in the production and experimental process.
ZYSFY-120A technical parameters:
Weighing value 120g
Display division value 0.001g
Readability 0.01%
Weighing sensor German HBM sensor
Processor British ARM
Heating source halogen lamp
Drying method automatic manual timing
Heating method standard, fast and gentle
Stop mode: automatic stop, timer stop, manual
Temperature setting: room temperature-180°C, 1°C increase)
Test data: weight before drying, weight after drying, moisture value, solid content, temperature, test time
Weight calibration 100g weighing pan size φ90 (mm)
Communication interface Standard RS232 communication interface-easy to connect printers, computers and other peripherals
Dimensions 330*205*165 (mm) length, width and height
Packing size 410*315*335 (mm)
Gross weight 4.6kg
Features:
1. No need to install, debug and train, it can be used after unpacking, simple operation, saving tedious steps;
2. The heating is uniform, the measuring time is short, the work efficiency is high, the performance is stable, and the test is accurate;
3. Small size and light weight;
4. Fully automatic measurement, alarm reminder after measurement, no need to watch the measurement process;
5. It has a wide range of uses and is almost suitable for moisture determination in various industries;
6. German imported sensors make the instrument test results more accurate;
7. The unique windshield design makes the instrument weighing system more stable;
8. The water content and solid content of the sample can be converted simultaneously;
9. The heating chamber adopts pure stainless steel chamber cover, which is resistant to high temperature and easy to clean.
Test steps:
1. In the state of 0.000, put the test sample in the sample pan (evenly spread)
2. Close the lid and press Start to start the heating test.
3. After the test, the screen directly displays the moisture content of the sample, press Set to switch various parameters, and then press Start to return to the next sample test.
Test small details:
1. Dry the sample pan before heating
2. The weight of the sample affects the measurement time and the repeatability of the results. It is recommended that the sample weight be about 5-10g
3.After testing a sample, wait for the temperature to drop below 50 degrees before retesting a new sample.


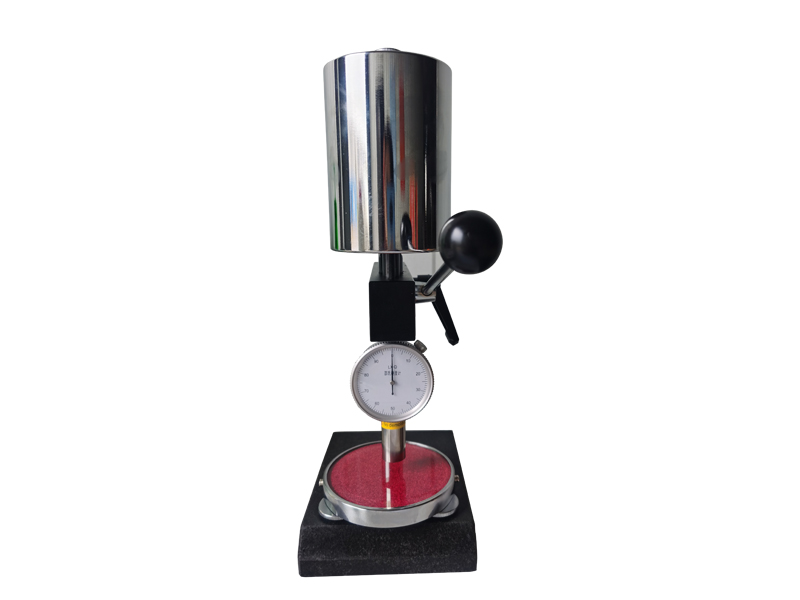
LX-D Plastic Hardness Tester
The LX-D Shore D hardness tester is suitable for testing the hardness of high-hardness materials such as general hard rubber, hard resin, acrylic, glass, thermoplastics, printing plates, and fibers. Products refer to GB/T531.1-2008 and other related standards.


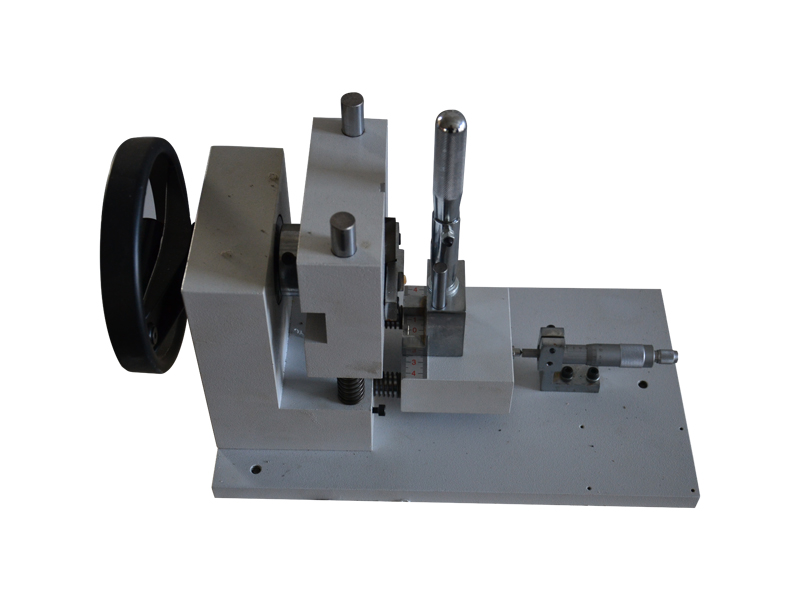
ZY-3011 Notch Prototype Machine
ZY-3011 Notch Prototype Machine
1. Purpose:
This machine is notched sample equipment used for cantilever beam and simply supported beam impact testing machine for impact toughness test of non-metallic materials.
2. Main technical specifications:
1. Tool stroke: 24mm
2. Feed speed: maximum speed 4mm/min
3. Sample type: Type 1, Type 2, Type 3, Type 4
4. Gap type: Type A, Type B, Type C
5. Tool parameters:
Type A tool: 45±1 degree r=0.25±0.025
Type B tool: 45±1 degree r=1.0±0.025
C1 type tool: 45±1 degree r=0.1±0.02
C2 type tool: thickness 0.8±0.1 r<=0.1
C3 type tool: thickness 2±0.1 r=0.2±0.05
Profile dedicated: 45±1 degree r=0.2±0.05
No special requirements, standard A, B, C3 knife mold
6. Feed amount: 0.5mm/stroke
7. Feed stroke: 10mm
8. The thickness of the cutable sample is ≤20mm


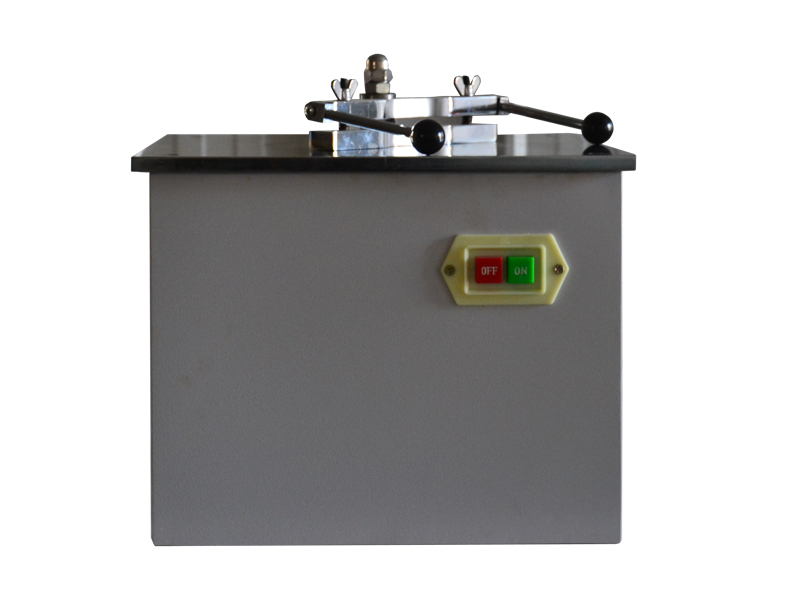
ZY-3012 dumbbell prototype machine
ZY-3012 dumbbell prototype machine
1. Purpose:
The dumbbell-shaped prototype machine adopts mechanical processing methods and is a special equipment for preparing standard dumbbell-shaped samples for tensile tests of various non-metallic materials. The samples prepared by this machine meet the type I and II dumbbell-shaped samples specified in GB/T1040-92 "Plastic Tensile Performance Test Method".
2. Main technical parameters:
1. Milling cutter diameter: φ27mm
2. Milling cutter speed: 2800r/min
3. Worktable size (length×width): 350mm×350mm
4. Dimensions: 350*350*300mm
5. Sample thickness: 1~20mm
6. A knife mold comes standard
7. Weight: 26Kg
8. Power supply voltage: 380V±10%
9. Power: 400W


Previous page
1
Next page
Yangzhou Zhengyi Testing Machinery Co., Ltd.
Service Hotline:
Add:
Address: Zhenxing North Road, Zhenwu Town, Jiangdu District, Yangzhou City, Jiangsu Province
Copyright: Yangzhou Zhengyi Testing Machinery Co., Ltd. 苏ICP备14021115号-4 Powered by:www.300.cn


