PRODUCT
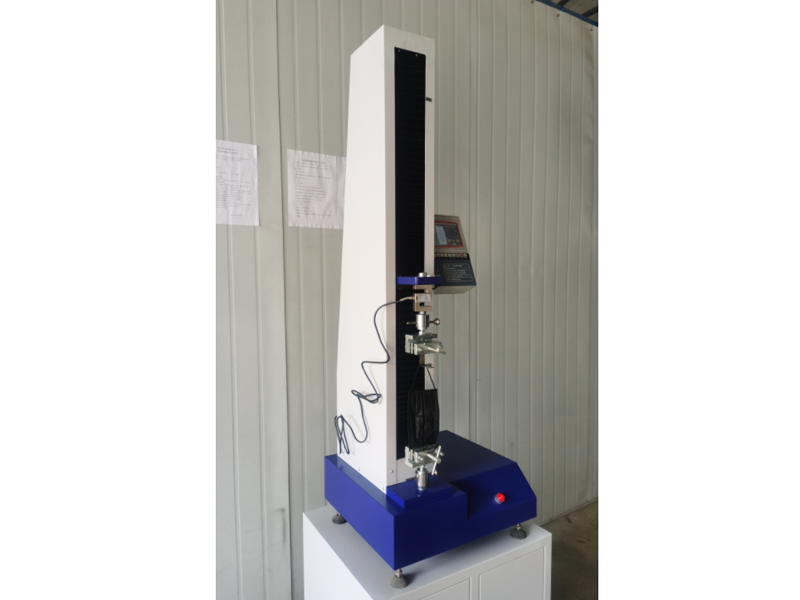
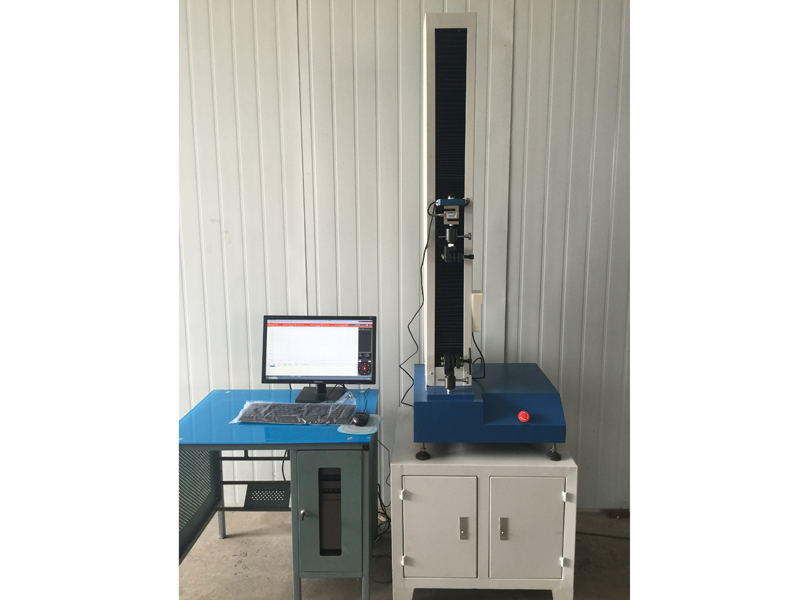
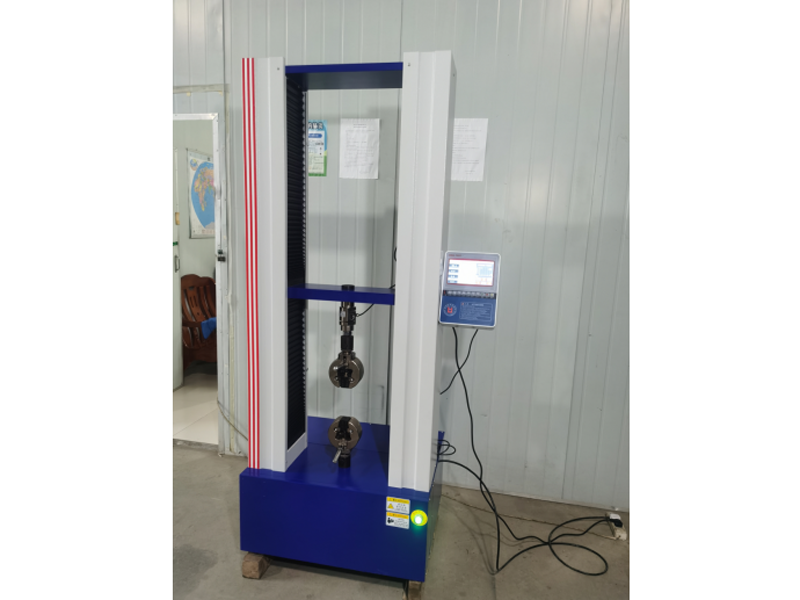
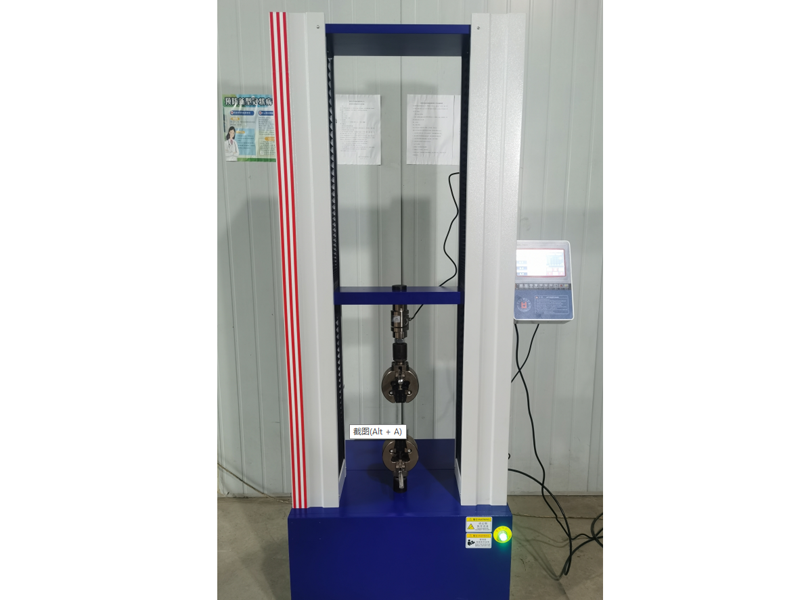
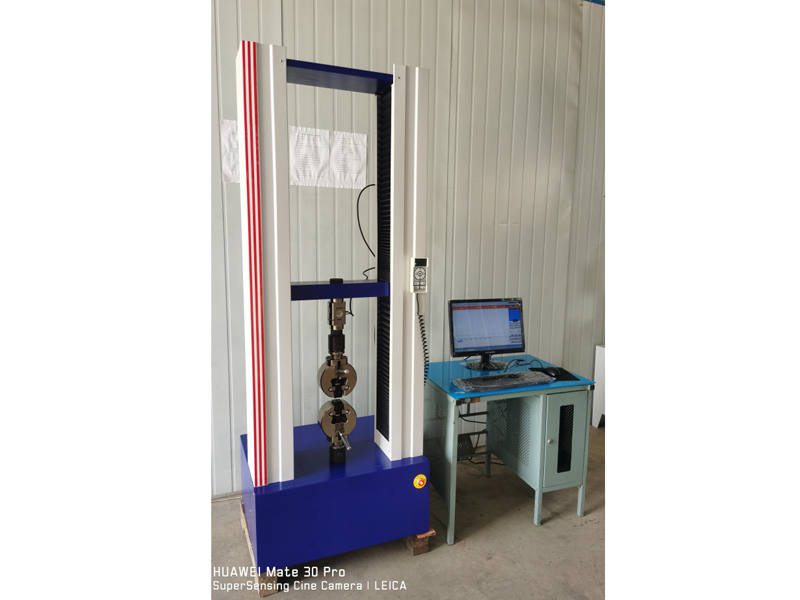
ZY-500N Mask Tensile Machine
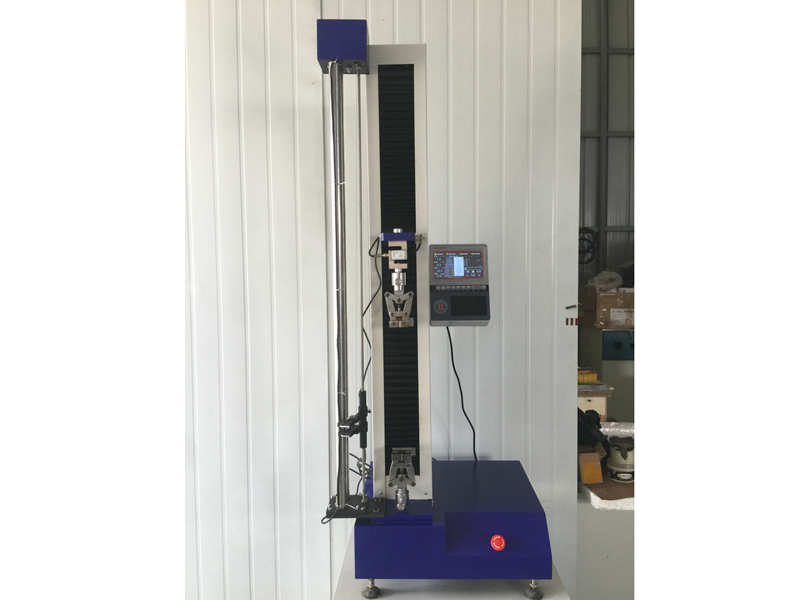
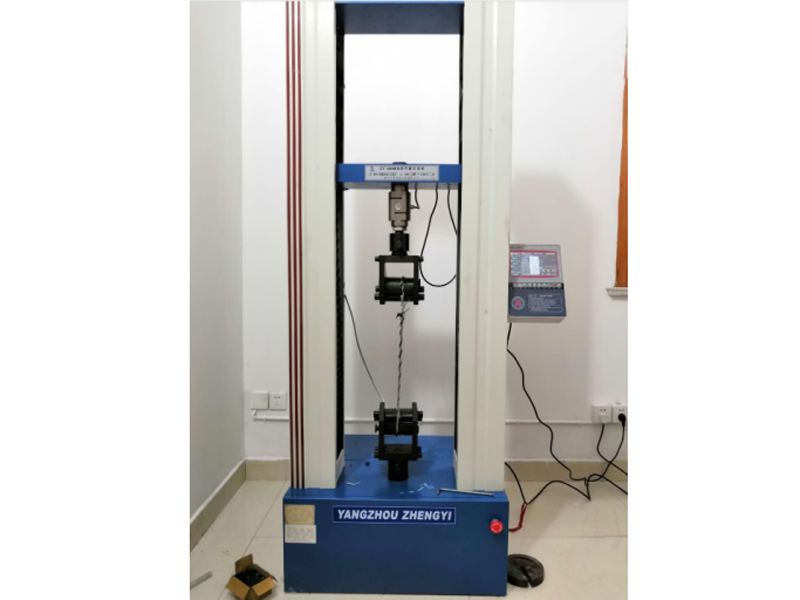
The ZY-500N mask tensile machine is an instrument used to test the mechanical properties of materials such as stretching, peeling, tearing, and H extraction. It is widely used in rubber, plastic, textile, chemical, steel wire, hose tape, wire and cable, plastic, pipe and other industries. It is a high-precision, economical and practical instrument.


ZY-500N Mask Tensile Machine
The ZY series mask tensile machine is used to measure the tensile properties of various masks.
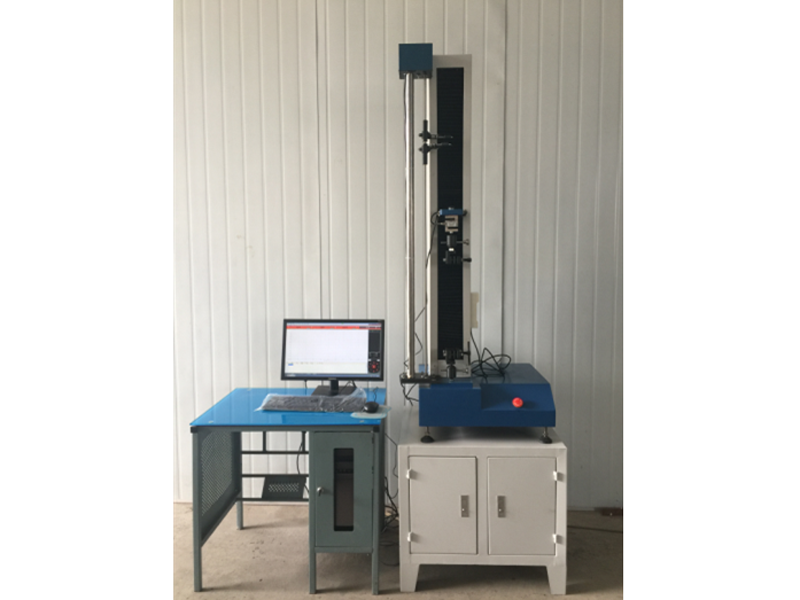
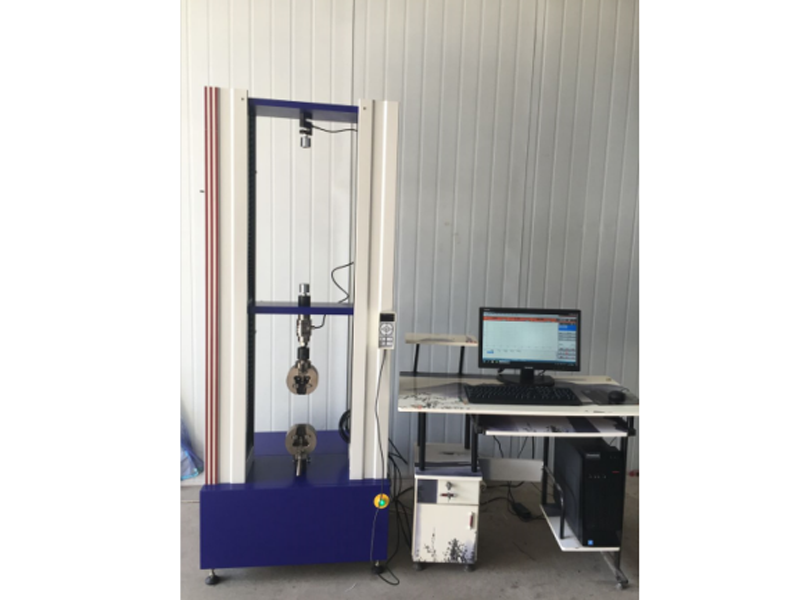
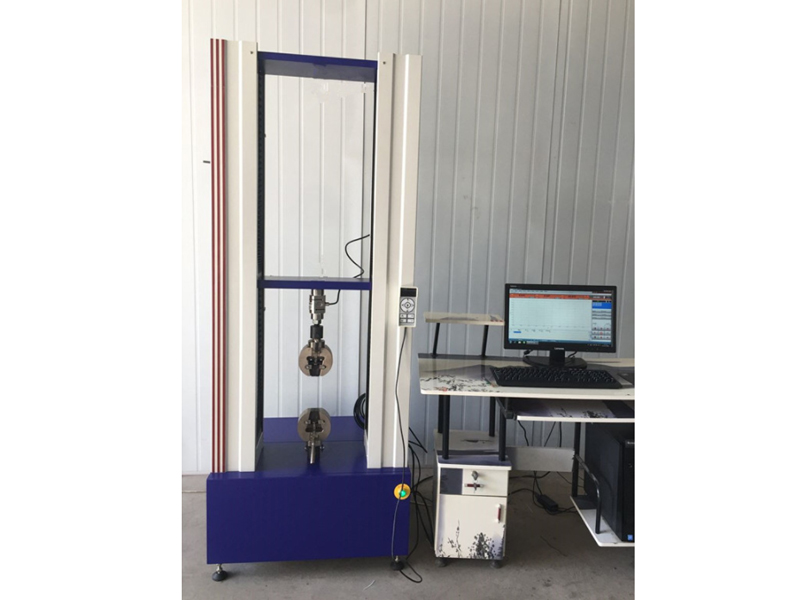
The appearance of this machine is novel and generous. Computer digital speed control system, equipped with force sensor and automatic elongation tracking device, good stability. Electrical appliances use PC and interface circuit boards to collect, store, process and print test results. The maximum force, yield force, average peel force, maximum deformation and other basic physical properties of the material can be calculated. During the test, the microcomputer collects the force value and deformation signal in real time, and the software displays the "force value-displacement" curve. After the test, it automatically calculates and saves the parameters, and can print out the report form the user needs.
2. Structural principle
The host is composed of an electronic speed regulation system, a transmission mechanism, a force measurement system and an extension automatic tracking device.
Electronic speed control system: The machine adopts AC speed control, corresponding to the stretching speed of 1-Xmm/min (X is the user's bottom request), and returns at high speed.
Elongation tracking device: This device is used to measure the deformation of the sample. It can be tracked by an external tracker or a built-in tracker. It can also be tracked by the deformation device built in the motor without the tracker.
3. Main technical parameters
1. Force resolution: 0.001-0.1N
2. System accuracy: less than ±0.1
3. Maximum test force: 500N
4. Accuracy level: 0.5
5. Test force measurement range: 1-99%
6. Test force indication error: less than or equal to 0.3%
7. Test force resolution: 0.001
8. Displacement resolution: 0.001
9. Displacement indication error: less than or equal to 0.5%
10. Speed range: 0-500mm/min (special requirements can be customized)
11. Large stroke of gripper: 800mm
12. Elongation tracking error: ±0.1mm
13. Power supply voltage: AC220V±10% 50Hz
14. Net weight: 120KG
Four, characteristics
Automatic clearing: After the computer controls the test command, the system automatically clears;
High intelligence: After the test, the fracture is automatically judged and the fixture automatically returns to the initial position
Multi-function: different fixtures can be replaced to carry out different tests;
Automatic shift: switch to different grades according to the size of the load;
Change speed: the test speed can be changed arbitrarily
Control method: Test methods such as test force, test speed, displacement and strain can be selected.
Powerful: Record test data throughout the process. Provides functional services such as saving, comparison and tracking. The mouse can be used to arbitrarily find out the point-by-point force value and deformation data analysis of the test curve, and it can be partially enlarged and compared.
Multiple protection: with automatic limit and automatic overload protection.
Automatic calculation: automatically calculate various test results, and can modify the report arbitrarily
Automatic length measurement: equipped with a high-precision encoder, automatically measuring the displacement stroke and elongation between punctuation.
High taste: finely crafted, smooth lines, coupled with high-precision software and hardware technology and integration capabilities, reflecting the exquisite manufacturing technology and dexterity.
Five, configuration
1. Single column type.
2. One high-precision sensor
3. Japan Omron high-precision photoelectric automatic tracker
4. The testing machine software has functions of automatic calculation, storage, comparison, etc.
5. High precision control drive system
6. High precision closed loop motor
7. German Thomson ball screw
8. Synchronous belt wheel transmission, no noise, no vibration, stable operation
9. 1 special test fixture
10. 19-inch Lenovo LCD computer, HP color printer.


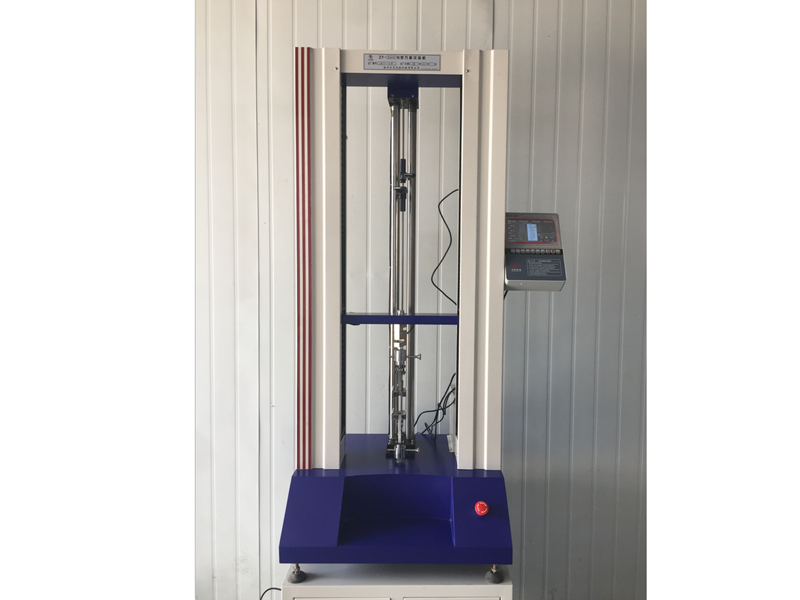
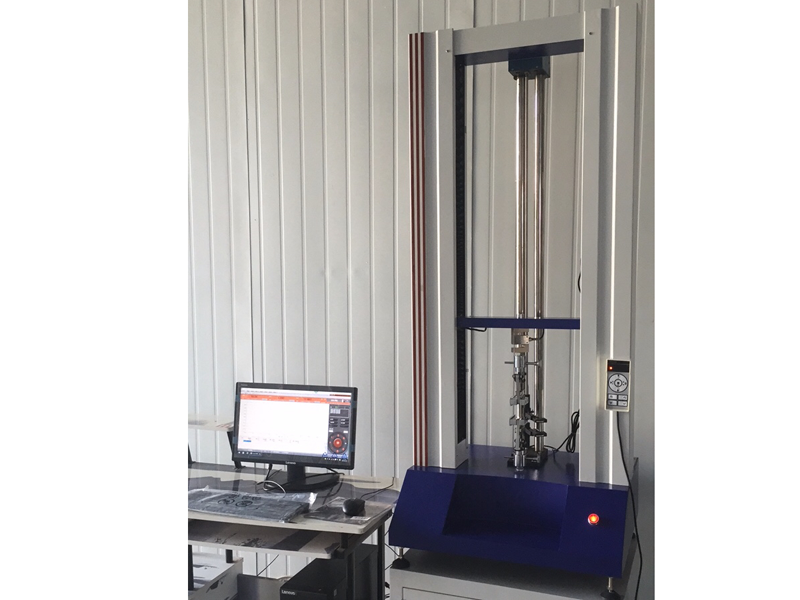
ZY-5000N Waterstop waterproof coiled material tensile machine
ZY-5000N Waterstop Tensile Machine is an instrument used to test the mechanical properties of materials such as stretching, peeling, tearing, and H extraction. It is widely used in rubber, plastic, textile, chemical, steel wire, hose tape, wire and cable, plastic, pipe and other industries. It is a high-precision, economical and practical instrument.
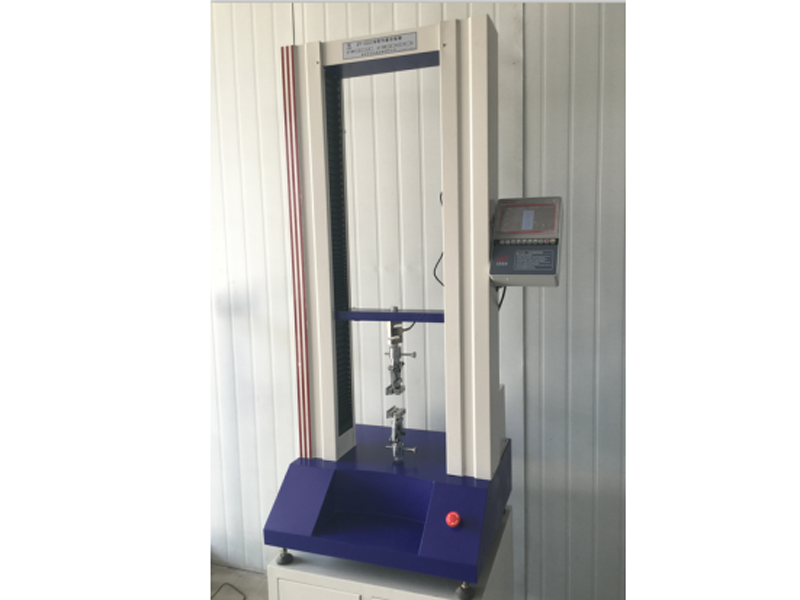
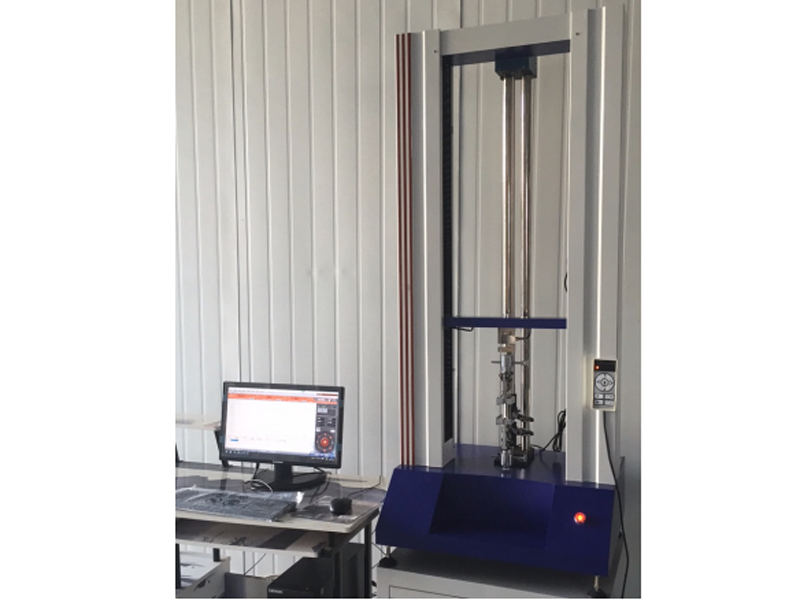
The tensile machine is composed of a host, a speed control system, data acquisition and processing, sensors and electrical interlocking parts. The host includes the fuselage, transmission mechanism, and measurement system. Data processing is handled by a microcomputer processor. This machine uses a stepping speed regulator to change the stretching speed, and the speed value is directly read out. The motor moves the lower gripper (fixture) through the V-belt-worm-screw drive, so as to realize the tensile change of the sample. The head of the main unit is equipped with a tension sensor, and its upper end is connected with the connecting plate of the top beam of the main unit, and the lower end is connected with the upper clamp. The sensor is only subject to vertical tension and is not affected by torsion or directional force to ensure force measurement accuracy. Between the upper and lower grippers, the force of the sample during the test is transformed into an electrical signal through the force sensor and input into the microcomputer acquisition control system. After the test is over, it is automatically processed, automatically calculated, and the result is displayed.
The touch LCD measurement and control system adopts 32-bit ARM technology and DSP high-performance processor control technology. The display part adopts a 7-inch 65K color ultra-clear touch screen with a resolution of 1024*768. The ultra-high performance configuration makes the software function and user experience great improve. The software includes boot animation, main screen display, large curve display, unit setting, multiple test standard selection and result calculation display, equipment status display, hardware parameter setting, equipment calibration, PID parameter setting, custom parameter editing, sample plan Editing, sample size editing, visual printing and other functions, the micro printer supports a variety of models to choose from, and the motor control supports free switching of multiple control methods such as servo, stepping, frequency conversion, and DC (the factory does not need to replace the system, and the standard features).
This test measurement and control system is a high-performance measurement and control instrument designed specifically for electronic testing machines that integrates measurement and control. It can perform tensile, compression, bending, shear, tear, and peel tests. The software can complete the maximum force, maximum deformation, tensile strength, elongation at break, total elongation at maximum force, elongation at yield point, elongation after fracture, upper and lower yield strength, elastic modulus, force at yield point, and elongation at break , Calculation and real-time display of parameters such as elongation at yield point, tensile strength at break, tensile stress at yield point, constant elongation stress, constant elongation (according to user-specified constant force level) and other parameters, among which the level of constant elongation The value and the constant force level value can be entered into the relevant position of the software in the sample parameter interface according to the actual requirements of the customer. The parameters that can be calculated also include compressive strength, upper and lower compression yield strength, compression elastic modulus, bending strength, bending elastic modulus, average bending force, average peel force, peel strength, maximum peel force, minimum peel force, tear strength , Average shear force, shear strength, shear modulus and other mechanical and physical properties related parameters.
Main interface function introduction


ZY-5000N Rubber Waterstop Tension Machine
ZY series waterstop tensile machine can be used for rubber, plastic, foam material, plastic, film, textile, fiber, polymer material, composite material, synthetic material, packaging tape, paper, wire and cable, fiber optic cable safety belt, leather belt , Shoes, tapes, polymers, spring steel, stainless steel, castings, non-ferrous metals, auto parts alloy materials and other non-metallic materials and metal materials for stretching, compression, bending, tearing, 90° peeling, 180° peeling , Shear, adhesion, pull-out force, elongation and other tests.
Host specifications
A. High-precision sensor: 5000N, the force accuracy is within ±0.5.
B. Capacity segmentation: Seven gears in the whole process: × 1, × 2, × 5, × 10, × 20, × 50, × 100 using high-precision 24 bits A/D, sampling frequency 200Hz, full force resolution 1/1000, 000
C. Power system: high-precision closed-loop drive motor.
D. Control system: Use Pulse Command control method to make the control more precise. Speed control range 0.001~1000 mm/min. The linkage board adjustment has fast coarse adjustment and slow fine adjustment functions. After the test, it will automatically return to the origin and automatically store.
E. Data transmission method: USB transmission
F. Display mode: UTM107+WIN-XP test software computer screen display.
G. Concise linear double correction system for the first gear and precise seven gears throughout the entire journey.
H. The luxurious test interface software can realize constant speed, positioning shift, constant load (hold time can be set), constant load increase rate, constant stress increase rate, constant strain increase rate and other control modes, plus multi-level control modes can meet different requirements Test requirements.
I. Test space: Test width is about 380mm (standard specification), and the board walking space is 850mm (excluding fixture) (standard specification)
J. Full displacement: Encoder 2500 P/R, 4 times higher accuracy. LINE DRIVE encoder with strong anti-jamming capability. Displacement resolution is 0.001mm. K. Device: overload emergency stop device, upper and lower stroke limit device, leakage automatic power-off system, automatic break point shutdown function.
k. Manual control mode: manual operation box.
Software function:
A. Test standard modularity function: Provide users with the test standard settings required by the application, covering GB, ASTM, DIN, JIS, BS... etc. Test standard specification.
B. Sample data: Provide users with all sample data set by the user, and input data once can be reused. The formula can be modified by itself to improve the fit of test data.
C. Double report editing: open user editing reports, for testers to choose their favorite report format (the test program adds a built-in EXCEL report editing function to extend the previous format of a single report)
D. The length, power unit, and display digits adopt dynamic interchange mode, power unit T, Kg, N, KN, g, lb, deformation unit mm, cm, inch.
E. Automatic Auto Scale of graph curve scale, which can make graph display in proper scale. And can switch dynamically in real-time graphics during testing. With load-displacement, load-time, displacement-time, stress-strain load-2 point extension diagram, and multi-curve comparison.
F. The test result can be output in the form of data in EXCEL format.
G. After the test, it can be automatically archived and manually archived. After the test, the maximum strength, upper and lower yield strength, hysteresis loop method, stepwise approximation method, non-proportional extension strength, tensile strength, compressive strength, and elongation strength at any point can be automatically calculated. , Any point fixed load extension, elastic modulus, elongation, peeling interval maximum, minimum, average, net energy, return energy, total energy, bending modulus, break point displacement x% load, break point load X% Displacement, etc. Data backup: test data can be saved in any hard disk partition.
H. Multiple languages switch randomly: Simplified Chinese, Traditional Chinese, English.
I. The software has a historical test data demonstration function.
The main technical parameters
1. Force resolution: 0.001-0.1N
2. System accuracy: less than ±0.1
3. Maximum test force: 5000N
4. Accuracy level: 0.5
5. Test force measurement range: 1-99%
6. Test force indication error: less than or equal to 0.3%
7. Test force resolution: 0.001
8. Displacement resolution: 0.001
9. Displacement indication error: less than or equal to 0.5%
10. Speed range: 0-500mm/min (special requirements can be customized)
11. The maximum stroke of the gripper: 800mm
12. Elongation tracking error: ±0.1mm
13. Power supply voltage: AC220V±10% 50Hz
14. Net weight: 150KG
Software features
Automatic clearing: After the computer controls the test command, the system automatically clears;
High intelligence: After the test, the fracture is automatically judged and the fixture automatically returns to the initial posi


ZY-5000N Fabric Geo-bulla Machine
The ZY-5000N geo-bulla machine is an instrument used to test the mechanical properties of materials such as stretching, peeling, tearing, and H extraction. It is widely used in rubber, plastic, textile, chemical, steel wire, hose tape, wire and cable, plastic, pipe and other industries. It is a high-precision, economical and practical instrument.
The tensile machine is composed of a host, a speed control system, data acquisition and processing, sensors and electrical interlocking parts. The host includes the fuselage, transmission mechanism, and measurement system. Data processing is handled by a microcomputer processor. This machine uses a stepping speed regulator to change the stretching speed, and the speed value is directly read out. The motor moves the lower gripper (fixture) through the V-belt-worm-screw drive, so as to realize the tensile change of the sample. The head of the main unit is equipped with a tension sensor, and its upper end is connected with the connecting plate of the top beam of the main unit, and the lower end is connected with the upper clamp. The sensor is only subject to vertical tension and is not affected by torsion or directional force to ensure force measurement accuracy. Between the upper and lower grippers, the force of the sample during the test is transformed into an electrical signal through the force sensor and input into the microcomputer acquisition control system. After the test is over, it is automatically processed, automatically calculated, and the result is displayed.
The touch LCD measurement and control system adopts 32-bit ARM technology and DSP high-performance processor control technology. The display part adopts a 7-inch 65K color ultra-clear touch screen with a resolution of 1024*768. The ultra-high performance configuration makes the software function and user experience great improve. The software includes boot animation, main screen display, large curve display, unit setting, multiple test standard selection and result calculation display, equipment status display, hardware parameter setting, equipment calibration, PID parameter setting, custom parameter editing, sample plan Editing, sample size editing, visual printing and other functions, the micro printer supports a variety of models to choose from, and the motor control supports free switching of multiple control methods such as servo, stepping, frequency conversion, and DC (the factory does not need to replace the system, and the standard features).
This test measurement and control system is a high-performance measurement and control instrument designed specifically for electronic testing machines that integrates measurement and control. It can perform tensile, compression, bending, shear, tear, and peel tests. The software can complete the maximum force, maximum deformation, tensile strength, elongation at break, total elongation at maximum force, elongation at yield point, elongation after fracture, upper and lower yield strength, elastic modulus, force at yield point, and elongation at break , Calculation and real-time display of parameters such as elongation at yield point, tensile strength at break, tensile stress at yield point, constant elongation stress, constant elongation (according to user-specified constant force level) and other parameters, among which the level of constant elongation The value and the constant force level value can be entered into the relevant position of the software in the sample parameter interface according to the actual requirements of the customer. The parameters that can be calculated also include compressive strength, upper and lower compression yield strength, compression elastic modulus, bending strength, bending elastic modulus, average bending force, average peel force, peel strength, maximum peel force, minimum peel force, tear strength , Average shear force, shear strength, shear modulus and other mechanical and physical properties related parameters.
Main interface function introduction


ZY-500N Plastic Film Tensile Machine
ZY-500N plastic film tensile machine is an instrument used to test the mechanical properties of materials such as stretching, peeling, tearing, and H extraction. It is widely used in rubber, plastic, textile, chemical, steel wire, hose tape, wire and cable, plastic, pipe and other industries. It is a high-precision, economical and practical instrument.
The tensile machine is composed of a host, a speed control system, data acquisition and processing, sensors and electrical interlocking parts. The host includes the fuselage, transmission mechanism, and measurement system. Data processing is handled by a microcomputer processor. This machine uses a stepping speed regulator to change the stretching speed, and the speed value is directly read out. The motor moves the lower gripper (fixture) through the V-belt-worm-screw drive, so as to realize the tensile change of the sample. The head of the main unit is equipped with a tension sensor, and its upper end is connected with the connecting plate of the top beam of the main unit, and the lower end is connected with the upper clamp. The sensor is only subject to vertical tension and is not affected by torsion or directional force to ensure force measurement accuracy. Between the upper and lower grippers, the force of the sample during the test is transformed into an electrical signal through the force sensor and input into the microcomputer acquisition control system. After the test is over, it is automatically processed, automatically calculated, and the result is displayed.
The touch LCD measurement and control system adopts 32-bit ARM technology and DSP high-performance processor control technology. The display part adopts a 7-inch 65K color ultra-clear touch screen with a resolution of 1024*768. The ultra-high performance configuration makes the software function and user experience great improve. The software includes boot animation, main screen display, large curve display, unit setting, multiple test standard selection and result calculation display, equipment status display, hardware parameter setting, equipment calibration, PID parameter setting, custom parameter editing, sample plan Editing, sample size editing, visual printing and other functions, the micro printer supports a variety of models to choose from, and the motor control supports free switching of multiple control methods such as servo, stepping, frequency conversion, and DC (the factory does not need to replace the system, and the standard features).
This test measurement and control system is a high-performance measurement and control instrument designed specifically for electronic testing machines that integrates measurement and control. It can perform tensile, compression, bending, shear, tear, and peel tests. The software can complete the maximum force, maximum deformation, tensile strength, elongation at break, total elongation at maximum force, elongation at yield point, elongation after fracture, upper and lower yield strength, elastic modulus, force at yield point, and elongation at break , Calculation and real-time display of parameters such as elongation at yield point, tensile strength at break, tensile stress at yield point, constant elongation stress, constant elongation (according to user-specified constant force level) and other parameters, among which the level of constant elongation The value and the constant force level value can be entered into the relevant position of the software in the sample parameter interface according to the actual requirements of the customer. The parameters that can be calculated also include compressive strength, upper and lower compression yield strength, compression elastic modulus, bending strength, bending elastic modulus, average bending force, average peel force, peel strength, maximum peel force, minimum peel force, tear strength , Average shear force, shear strength, shear modulus and other mechanical and physical properties related parameters.
Main interface function introduction


ZY-500N Plastic Film Tensile Machine
ZY series plastic film tensile machine can be used for rubber, plastic, foam material, plastic, film, textile, fiber, nano material, polymer material, composite material, synthetic material, packaging tape, paper, wire and cable, fiber optic cable, safety belt , Safety belts, leather belts, footwear, tapes, polymers, spring steel, stainless steel, castings, non-ferrous metals, auto parts alloy materials and other non-metallic materials and metal materials for stretching, compression, bending, tearing, 90 °Peel, 180° peel, shear, adhesion, pull-out force, elongation and other tests.
Host specifications
A. High-precision sensor: 500N, the force accuracy is within ±0.5.
B. Capacity segmentation: Seven gears in the whole process: × 1, × 2, × 5, × 10, × 20, × 50, × 100 using high-precision 24 bits A/D, sampling frequency 200Hz, full force resolution 1/1000, 000
C. Power system: high-precision closed-loop drive motor.
D. Control system: Use Pulse Command control method to make the control more precise. Speed control range 0.001~1000 mm/min. The linkage board adjustment has fast coarse adjustment and slow fine adjustment functions. After the test, it will automatically return to the origin and automatically store.
E. Data transmission method: USB transmission
F. Display mode: UTM107+WIN-XP test software computer screen display.
G. Concise linear double correction system for the first gear and precise seven gears throughout the entire journey.
H. The luxurious test interface software can realize constant speed, positioning shift, constant load (hold time can be set), constant load increase rate, constant stress increase rate, constant strain increase rate and other control modes, plus multi-level control modes can meet different requirements Test requirements.
I. Test space: 850mm (without fixtures) for the walking space of the board (standard specifications)
J. Full displacement: Encoder 2500 P/R, 4 times higher accuracy. LINE DRIVE encoder with strong anti-interference ability. Displacement resolution is 0.001mm. K. Safety device: overload emergency stop device, upper and lower stroke limit device, leakage automatic power-off system, automatic break point shutdown function.
k. Manual control mode: manual operation box.
Software function:
A. Test standard modularity function: Provide users with the test standard settings required by the application, covering GB, ASTM, DIN, JIS, BS... etc. Test standard specification.
B. Sample data: Provide users with all sample data set by the user, and enter the data once and reuse it permanently. The formula can be modified by itself to improve the fit of test data.
C. Double report editing: completely open for users to edit reports, allowing testers to choose their favorite report format (the test program adds a built-in EXCEL report editing function to extend the previous format of a single professional report)
D. The length, power unit, and display digits adopt dynamic interchange mode, power unit T, Kg, N, KN, g, lb, deformation unit mm, cm, inch.
E. The graph curve scale automatically optimizes Auto Scale, so that the graph can be displayed at the best scale. And can switch dynamically in real-time graphics during testing. With load-displacement, load-time, displacement-time, stress-strain load-2 point extension diagram, and multi-curve comparison.
F. The test result can be output in the form of data in EXCEL format.
G. After the test, it can be automatically archived and manually archived. After the test, the maximum strength, upper and lower yield strength, hysteresis loop method, stepwise approximation method, non-proportional extension strength, tensile strength, compressive strength, and elongation strength at any point can be automatically calculated. , Any point fixed load extension, elastic modulus, elongation, peeling interval maximum, minimum, average, net energy, return energy, total energy, bending modulus, break point displacement x% load, break point load X% Displacement, etc. Data backup: test data can be saved in any hard disk partition.
H. Multiple languages switch randomly: Simplified Chinese, Traditional Chinese, English.
I. The software has a historical test data demonstration function.
The main technical parameters
1. Force resolution: 0.001-0.1N
2. System accuracy: less than ±0.1
3. Maximum test force: 500N
4. Accuracy level: 0.5
5. Test force measurement range: 1-100%
6. Test force indication error: less than or equal to 0.3%
7. Test force resolution: 0.001
8. Displacement resolution: 0.001
9. Displacement indication error: less than or equal to 0.5%
10. Speed range: 0-500mm/min (special requirements can be customized)
11. The maximum stroke of the gripper: 800mm
12. Elongation tracking error: ±0.1mm
13. Power supply voltage: AC220V±10% 50Hz
14. Net weight: 100KG
Features
Automatic clearing: After the computer controls the test command, the system automatically clears;
High intelligence: After the test, the fracture is automatically judged and


ZY-5000N Fabric Geo-bulla Machine
The ZY series tensile machine can be used for cloth geotextile, rubber, plastic, foam material, plastic, film, textile, fiber, polymer material, composite material, synthetic material, packaging tape, paper, wire and cable, fiber optic cable safety belt, leather Belts, shoes, tapes, polymers, spring steel, stainless steel, castings, non-ferrous metals, auto parts alloy materials and other non-metal materials and metal materials are stretched, compressed, bent, teared, 90° peeled, 180° Peel, shear, adhesion, pull-out force, elongation and other tests.
Host specifications
A. High-precision sensor: 5000N, the force accuracy is within ±0.5.
B. Capacity segmentation: Seven gears in the whole process: × 1, × 2, × 5, × 10, × 20, × 50, × 100 using high-precision 24 bits A/D, sampling frequency 200Hz, full force resolution 1/1000, 000
C. Power system: high-precision closed-loop drive motor.
D. Control system: Use Pulse Command control method to make the control more precise. Speed control range 0.001~1000 mm/min. The linkage board adjustment has fast coarse adjustment and slow fine adjustment functions. After the test, it will automatically return to the origin and automatically store.
E. Data transmission method: USB transmission
F. Display mode: UTM107+WIN-XP test software computer screen display.
G. Concise linear double correction system for the first gear and precise seven gears throughout the entire journey.
H. The luxurious test interface software can realize constant speed, positioning shift, constant load (hold time can be set), constant load increase rate, constant stress increase rate, constant strain increase rate and other control modes, plus multi-level control modes can meet different requirements Test requirements.
I. Test space: Test width is about 380mm (standard specification), and the board walking space is 850mm (excluding fixture) (standard specification)
J. Full displacement: Encoder 2500 P/R, 4 times higher accuracy. LINE DRIVE encoder with strong anti-jamming capability. Displacement resolution is 0.001mm. K. Device: overload emergency stop device, upper and lower stroke limit device, leakage automatic power-off system, automatic break point shutdown function.
k. Manual control mode: manual operation box.
Software function:
A. Test standard modularity function: Provide users with the test standard settings required by the application, covering GB, ASTM, DIN, JIS, BS... etc. Test standard specification.
B. Sample data: Provide users with all sample data set by the user, and input data once can be reused. The formula can be modified by itself to improve the fit of test data.
C. Double report editing: open user editing reports, for testers to choose their favorite report format (the test program adds a built-in EXCEL report editing function to extend the previous format of a single report)
D. The length, power unit, and display digits adopt dynamic interchange mode, power unit T, Kg, N, KN, g, lb, deformation unit mm, cm, inch.
E. Automatic Auto Scale of graph curve scale, which can make graph display in proper scale. And can switch dynamically in real-time graphics during testing. With load-displacement, load-time, displacement-time, stress-strain load-2 point extension diagram, and multi-curve comparison.
F. The test result can be output in the form of data in EXCEL format.
G. After the test, it can be automatically archived and manually archived. After the test, the maximum strength, upper and lower yield strength, hysteresis loop method, stepwise approximation method, non-proportional extension strength, tensile strength, compressive strength, and elongation strength at any point can be automatically calculated. , Any point fixed load extension, elastic modulus, elongation, peeling interval maximum, minimum, average, net energy, return energy, total energy, bending modulus, break point displacement x% load, break point load X% Displacement, etc. Data backup: test data can be saved in any hard disk partition.
H. Multiple languages switch randomly: Simplified Chinese, Traditional Chinese, English.
I. The software has a historical test data demonstration function.
The main technical parameters
1. Force resolution: 0.001-0.1N
2. System accuracy: less than ±0.1
3. Maximum test force: 5000N
4. Accuracy level: 0.5
5. Test force measurement range: 1-99%
6. Test force indication error: less than or equal to 0.3%
7. Test force resolution: 0.001
8. Displacement resolution: 0.001
9. Displacement indication error: less than or equal to 0.5%
10. Speed range: 0-500mm/min
11. The maximum stroke of the gripper: 800mm
12. Elongation tracking error: ±0.1mm
13. Power supply voltage: AC220V±10% 50Hz
14. Net weight: 150KG
Software features
Automatic clearing: After the computer controls the test command, the system automatically clears;
High intelligence: After the test, the fracture is automatically judged and the fixture automatically returns to the initial position
Multi-function: different fixtures can


ZY-50kN Plate Screw Tension Machine
ZY-50kN sheet screw tension machine is an instrument used to test the mechanical properties of materials such as tensile, peeling, tearing, and H extraction. It is widely used in rubber, plastic, textile, chemical, steel wire, hose tape, wire and cable, plastic, pipe and other industries. It is a high-precision, economical and practical instrument.
The tensile machine is composed of a host, a speed control system, data acquisition and processing, sensors and electrical interlocking parts. The host includes the fuselage, transmission mechanism, and measurement system. Data processing is handled by a microcomputer processor. This machine uses a stepping speed regulator to change the stretching speed, and the speed value is directly read out. The motor moves the lower gripper (fixture) through the V-belt-worm-screw drive, so as to realize the tensile change of the sample. The head of the main unit is equipped with a tension sensor, and its upper end is connected with the connecting plate of the top beam of the main unit, and the lower end is connected with the upper clamp. The sensor is only subject to vertical tension and is not affected by torsion or directional force to ensure force measurement accuracy. Between the upper and lower grippers, the force of the sample during the test is transformed into an electrical signal through the force sensor and input into the microcomputer acquisition control system. After the test is over, it is automatically processed, automatically calculated, and the result is displayed.


ZY-50kN Plate Screw Tension Machine
ZY series testing machine can be used for plate screw, plastic, foam material, plastic, film, textile, fiber, polymer material, composite material, synthetic material, packaging tape, paper, wire and cable, fiber optic cable, safety belt, safety belt, Leather belts, shoes, tapes, polymers, spring steel, stainless steel, castings, non-ferrous metals, auto parts alloy materials and other non-metallic materials and metal materials are stretched, compressed, bent, teared, 90° peeled, 180 °Peel, shear, adhesion, pull-out force, elongation and other tests.
Host specifications
A. High-precision joint-venture force sensor: 50kN
The force accuracy is within ±0.5.
B. Capacity segmentation: Seven gears in the whole process: × 1, × 2, × 5, × 10, × 20, × 50, × 100 using high-precision 24 bits A/D, sampling frequency 200Hz, full force resolution 1/1000, 000
C. Power system: AC servo + servo motor + AC drive + polished rod linear bearing.
D. Control system: Use Pulse Command control method to make the control more precise. Speed control range 0.001~1000 mm/min. The linkage board adjustment has fast coarse adjustment and slow fine adjustment functions. After the test, it will automatically return to the origin and automatically store.
E. Data transmission method: USB transmission
F. Display mode: UTM107+WIN-XP test software computer screen display.
G. Concise linear double correction system for the first gear and precise seven gears throughout the entire journey.
H. The luxurious test interface software can realize constant speed, positioning shift, constant load (hold time can be set), constant load increase rate, constant stress increase rate, constant strain increase rate and other control modes, plus multi-level control modes can meet different requirements Test requirements.
I. Test space: Test width is about 400 mm (standard specifications), and the board walking space is 950 mm (excluding fixtures) (standard specifications)
J. Full displacement: Encoder 2500 P/R, 4 times higher accuracy. LINE DRIVE encoder with strong anti-interference ability. Displacement resolution is 0.001mm. K. Protection device: overload emergency shutdown device, upper and lower travel limit device, leakage automatic power-off system, automatic break point shutdown function.
k. Manual control mode: manual operation box.
Software function:
A. Test standard modularity function: Provide users with the test standard settings required by the application, covering GB, ASTM, DIN, JIS, BS... etc. Test standard specification.
B. Sample data: Provide users with all sample data set by the user, and input data once can be reused. The formula can be modified by itself to improve the fit of test data.
C. Double report editing: open user editing reports, for testers to choose their favorite report format (the test program adds a built-in EXCEL report editing function to extend the previous format of a single report)
D. The length, power unit, and display digits adopt dynamic interchange mode, power unit T, Kg, N, KN, g, lb, deformation unit mm, cm, inch.
E. Automatic Auto Scale of graph curve scale, which can make graph display in proper scale. And can switch dynamically in real-time graphics during testing. With load-displacement, load-time, displacement-time, stress-strain load-2 point extension diagram, and multi-curve comparison.
F. The test result can be output in the form of data in EXCEL format.
G. After the test, it can be automatically archived and manually archived. After the test, the calculation force value, upper and lower yield strength, hysteresis loop method, stepwise approximation method, non-proportional extension strength, tensile strength, compressive strength, and arbitrary point elongation strength are automatically calculated. , Any point fixed load extension, elastic modulus, elongation, peeling interval maximum, minimum, average, net energy, return energy, total energy, bending modulus, break point displacement x% load, break point load X% Displacement, etc. Data backup: test data can be saved in any hard disk partition.
H. Multiple languages switch randomly: Simplified Chinese, Traditional Chinese, English.
I. The software has a historical test data demonstration function.
Summary description:
Clear: After the computer controls the test command, the system will automatically clear;
High intelligence: After the test, the fracture is automatically judged and the fixture automatically returns to the initial position
Multi-function: different fixtures can be replaced to carry out different tests;
Automatic shift: switch to different grades according to the size of the load;
Change speed: the test speed can be changed arbitrarily
Control method: Test methods such as test force, test speed, displacement and strain can be selected.
Powerful: Record test data throughout the process. Provides functional services such as saving, comparison and tracking. The mouse can be used to arbitrarily find out the point-by-point force value and


ZY-50kN safety rope belt tension machine
ZY-50kN safety rope safety belt tension machine is an instrument used to test the mechanical properties of materials such as stretching, peeling, tearing, and H extraction. It is widely used in rubber, plastic, textile, chemical, steel wire, hose tape, wire and cable, plastic, pipe and other industries. It is a high-precision, economical and practical instrument.


ZY-50kN safety rope belt tension machine
ZY series safety rope safety belts are used to determine the mechanical properties of various materials such as tension, compression, bending, shearing, tearing and peeling. It can also be used for plate screws, plastics, foam materials, plastics, films, textiles, fibers, polymer materials, composite materials, synthetic materials, packaging tapes, paper, wires and cables, fiber optic cables, safety belts, safety belts, leather belts, Footwear, tape, polymer, spring steel, stainless steel, castings, non-ferrous metals, auto parts alloy materials and other non-metallic materials and metal materials are stretched, compressed, bent, teared, 90° peeled, 180° peeled, Shear, adhesion, pull-out force, elongation and other tests.
Host specifications
A. High-precision joint-venture force sensor: 50kN, and the force accuracy is within ±0.5.
B. Capacity segmentation: Seven gears in the whole process: × 1, × 2, × 5, × 10, × 20, × 50, × 100 using high-precision 24 bits A/D, sampling frequency 200Hz, full force resolution 1/1000, 000
C. Power system: AC servo + servo motor + AC drive + polished rod linear bearing.
D. Control system: Use Pulse Command control method to make the control more precise. Speed control range 0.001~1000 mm/min. The linkage board adjustment has fast coarse adjustment and slow fine adjustment functions. After the test, it will automatically return to the origin and automatically store.
E. Data transmission method: USB transmission
F. Display mode: UTM107+WIN-XP test software computer screen display.
G. Concise linear double correction system for the first gear and precise seven gears throughout the entire journey.
H. The luxurious test interface software can realize constant speed, positioning shift, constant load (hold time can be set), constant load increase rate, constant stress increase rate, constant strain increase rate and other control modes, plus multi-level control modes can meet different requirements Test requirements.
I. Test space: Test width is about 400 mm (standard specifications), and the board walking space is 950 mm (excluding fixtures) (standard specifications)
J. Full displacement: Encoder 2500 P/R, 4 times higher accuracy. LINE DRIVE encoder with strong anti-interference ability. Displacement resolution is 0.001mm. K. Protection device: overload emergency shutdown device, upper and lower travel limit device, leakage automatic power-off system, automatic break point shutdown function.
k. Manual control mode: manual operation box.
Software function:
A. Test standard modularity function: Provide users with the test standard settings required by the application, covering GB, ASTM, DIN, JIS, BS... etc. Test standard specification.
B. Sample data: Provide users with all sample data set by the user, and input data once can be reused. The formula can be modified by itself to improve the fit of test data.
C. Double report editing: open user editing reports, for testers to choose their favorite report format (the test program adds a built-in EXCEL report editing function to extend the previous format of a single report)
D. The length, power unit, and display digits adopt dynamic interchange mode, power unit T, Kg, N, KN, g, lb, deformation unit mm, cm, inch.
E. Automatic Auto Scale of graph curve scale, which can make graph display in proper scale. And can switch dynamically in real-time graphics during testing. With load-displacement, load-time, displacement-time, stress-strain load-2 point extension diagram, and multi-curve comparison.
F. The test result can be output in the form of data in EXCEL format.
G. After the test, it can be automatically archived and manually archived. After the test, the calculation force value, upper and lower yield strength, hysteresis loop method, stepwise approximation method, non-proportional extension strength, tensile strength, compressive strength, and arbitrary point elongation strength are automatically calculated. , Any point fixed load extension, elastic modulus, elongation, peeling interval maximum, minimum, average, net energy, return energy, total energy, bending modulus, break point displacement x% load, break point load X% Displacement, etc. Data backup: test data can be saved in any hard disk partition.
H. Multiple languages switch randomly: Simplified Chinese, Traditional Chinese, English.
I. The software has a historical test data demonstration function.
Summary description:
Clear: After the computer controls the test command, the system will automatically clear;
High intelligence: After the test, the fracture is automatically judged and the fixture automatically returns to the initial position
Multi-function: different fixtures can be replaced to carry out different tests;
Automatic shift: switch to different grades according to the size of the load;
Change speed: the test speed can be changed arbitrarily
Control method: Test methods such as test force, test speed, displacement and strain can be selected.
Powerful: Record test dat


ZY-100kN copper rod aluminum rod copper rod aluminum rod tensile machine
ZY series digital display electronic tensile machine is an instrument used to test the mechanical properties of materials such as stretching, peeling, tearing, and H extraction. It is widely used in rubber, plastic, textile, chemical, steel wire, hose tape, wire and cable, plastic, pipe and other industries. It is a high-precision, economical and practical instrument.
The tensile machine is composed of a host, a speed control system, data acquisition and processing, sensors and electrical interlocking parts. The host includes the fuselage, transmission mechanism, and measurement system. Data processing is handled by a microcomputer processor. This machine uses a stepping speed regulator to change the stretching speed, and the speed value is directly read out. The motor moves the lower gripper (fixture) through the V-belt-worm-screw drive, so as to realize the tensile change of the sample. The head of the main unit is equipped with a tension sensor, and its upper end is connected with the connecting plate of the top beam of the main unit, and the lower end is connected with the upper clamp. The sensor is only subject to vertical tension and is not affected by torsion or directional force to ensure force measurement accuracy. Between the upper and lower grippers, the force of the sample during the test is transformed into an electrical signal through the force sensor and input into the microcomputer acquisition control system. After the test is over, it is automatically processed, automatically calculated, and the result is displayed.
The touch LCD measurement and control system adopts 32-bit ARM technology and DSP high-performance processor control technology, and the display part adopts a 7-inch 65K color ultra-clear touch screen with a resolution of 1024*768. The ultra-high performance configuration makes the software function and user experience great Promote. The software includes boot animation, main screen display, large curve display, unit setting, multiple test standard selection and result calculation display, equipment status display, hardware parameter setting, equipment calibration, PID parameter setting, custom parameter editing, sample plan Editing, sample size editing, visual printing and other functions, the micro printer supports a variety of models to choose from, and the motor control supports free switching of multiple control methods such as servo, stepping, frequency conversion, and DC (the factory does not need to replace the system, and the standard features).
This test measurement and control system is a high-performance measurement and control instrument designed specifically for electronic universal testing machines that integrates measurement and control. It can perform tensile, compression, bending, shear, tear, and peel tests. The software can complete the maximum force, maximum deformation, tensile strength, elongation at break, total elongation at maximum force, elongation at yield point, elongation after fracture, upper and lower yield strength, elastic modulus, force at yield point, and elongation at break , Calculation and real-time display of parameters such as elongation at yield point, tensile strength at break, tensile stress at yield point, constant elongation stress, constant elongation (according to user-specified constant force level) and other parameters, among which the level of constant elongation The value and the constant force level value can be entered into the relevant position of the software in the sample parameter interface according to the actual requirements of the customer. The parameters that can be calculated also include compressive strength, upper and lower compression yield strength, compression elastic modulus, bending strength, bending elastic modulus, average bending force, average peel force, peel strength, maximum peel force, minimum peel force, tear strength , Average shear force, shear strength, shear modulus and other mechanical and physical properties related parameters.
Main interface function introduction


ZY-100kN copper rod aluminum rod copper rod aluminum rod testing machine
The ZY-100kN copper rod and aluminum rod copper rod and aluminum rod testing machine can stretch, compress, bend, tear, and tear spring steel, stainless steel, castings, non-ferrous metals, auto parts alloy materials and other non-metallic materials and metal materials. °Peel, 180° peel, shear, adhesion, pull-out force, elongation and other tests.
Host specifications
A. High-precision joint-venture force sensor: 100kN
The force accuracy is within ±0.5.
B. Capacity segmentation: Seven gears in the whole process: × 1, × 2, × 5, × 10, × 20, × 50, × 100 using high-precision 24 bits A/D, sampling frequency 200Hz, full force resolution 1/1000, 000
C. Power system: AC servo + servo motor + AC drive + reducer + polished rod linear bearing.
D. Control system: Use Pulse Command control method to make the control more precise. Speed control range 0.001~1000 mm/min. The linkage board adjustment has fast coarse adjustment and slow fine adjustment functions. After the test, it will automatically return to the origin and automatically store.
E. Data transmission method: USB transmission
F. Display mode: UTM107+WIN-XP test software computer screen display.
G. Concise linear double correction system for the first gear and precise seven gears throughout the entire journey.
H. The luxurious test interface software can realize constant speed, positioning shift, constant load (hold time can be set), constant load increase rate, constant stress increase rate, constant strain increase rate and other control modes, plus multi-level control modes can meet different requirements Test requirements.
I. Test space: Test width is about 400 mm (standard specifications), and the board walking space is 950 mm (excluding fixtures) (standard specifications)
J. Full displacement: Encoder 2500 P/R, 4 times higher accuracy. LINE DRIVE encoder with strong anti-jamming capability. Displacement resolution is 0.001mm. K. Protection device: overload emergency shutdown device, upper and lower travel limit device, leakage automatic power-off system, automatic break point shutdown function.
k. Manual control mode: manual operation box.
Software function:
A. Test standard modularity function: Provide users with the test standard settings required by the application, covering GB, ASTM, DIN, JIS, BS... etc. Test standard specification.
B. Sample data: Provide users with all sample data set by the user, and input data once can be reused. The formula can be modified by itself to improve the fit of test data.
C. Double report editing: open user editing reports, for testers to choose their favorite report format (the test program adds a built-in EXCEL report editing function to extend the previous format of a single report)
D. The length, power unit, and display digits adopt dynamic interchange mode, power unit T, Kg, N, KN, g, lb, deformation unit mm, cm, inch.
E. Automatic Auto Scale of graph curve scale, which can make graph display in proper scale. And can switch dynamically in real-time graphics during testing. With load-displacement, load-time, displacement-time, stress-strain load-2 point extension diagram, and multi-curve comparison.
F. The test result can be output in the form of data in EXCEL format.
G. After the test, it can be automatically archived and manually archived. After the test, the maximum strength, upper and lower yield strength, hysteresis loop method, stepwise approximation method, non-proportional extension strength, tensile strength, compressive strength, and elongation strength at any point can be automatically calculated. , Any point fixed load extension, elastic modulus, elongation, peeling interval maximum, minimum, average, net energy, return energy, total energy, bending modulus, break point displacement x% load, break point load X% Displacement, etc. Data backup: test data can be saved in any hard disk partition.
H. Multiple languages switch randomly: Simplified Chinese, Traditional Chinese, English.
I. The software has a historical test data demonstration function.
Summary description:
Clear: After the computer controls the test command, the system will automatically clear;
High intelligence: After the test, the fracture is automatically judged and the fixture automatically returns to the initial position
Multi-function: different fixtures can be replaced to carry out different tests;
Automatic shift: switch to different grades according to the size of the load;
Change speed: the test speed can be changed arbitrarily
Control method: Test methods such as test force, test speed, displacement and strain can be selected.
Powerful: Record test data throughout the process. Provides functional services such as saving, comparison and tracking. The mouse can be used to arbitrarily find out the point-by-point force value and deformation data analysis of the test curve, and it can be partially enlarged and compared.
Multiple protection: with automatic limit and automatic overload protection.
Automatic calculation: automatically c


ZY-50kN Static Load Testing Machine
The static load testing machine can test rubber, plastics, foam materials, plastics, films, textiles, fibers, polymer materials, composite materials, synthetic materials, packaging tapes, paper, wires and cables, fiber optic cables, safety belts, safety belts, leather Belts, shoes, tapes, polymers, spring steel, stainless steel, castings, non-ferrous metals, auto parts alloy materials and other non-metal materials and metal materials are stretched, compressed, bent, teared, 90° peeled, 180° Peel, shear, adhesion, pull-out force, elongation and other tests.
Host specifications
A. High-precision sensor: 50kN, force accuracy within ±0.5.
B. Capacity segmentation: Seven gears in the whole process: × 1, × 2, × 5, × 10, × 20, × 50, × 100 using high-precision 24 bits A/D, sampling frequency 200Hz, full force resolution 1/1000, 000
C. Power system: AC servo + servo motor + AC drive + reducer + polished rod linear bearing.
D. Control system: Use Pulse Command control method to make the control more precise. Speed control range 0.001~1000 mm/min. The linkage board adjustment has fast coarse adjustment and slow fine adjustment functions. After the test, it will automatically return to the origin and automatically store.
E. Data transmission method: RS232 transmission
F. Display mode: UTM107+WIN-XP test software computer screen display.
G. Concise linear double correction system for the first gear and precise seven gears throughout the entire journey.
H. The luxurious test interface software can realize constant speed, positioning shift, constant load (hold time can be set), constant load increase rate, constant stress increase rate, constant strain increase rate and other control modes, plus multi-level control modes can meet different requirements Test requirements.
I. Full displacement: Encoder 2500 P/R, 4 times higher accuracy. LINE DRIVE encoder with strong anti-interference ability. Displacement resolution is 0.001mm. K. Protection device: overload emergency shutdown device, upper and lower travel limit device, leakage automatic power-off system, automatic break point shutdown function.
J. Manual control method: manual operation box.
Software function:
A. Test standard modularity function: Provide users with the test standard settings required by the application, covering GB, ASTM, DIN, JIS, BS... etc. Test standard specification.
B. Sample data: Provide users with all sample data set by the user, and input the data once and use it repeatedly. The formula can be modified by itself to improve the fit of test data.
C. Double report editing: open user editing reports, for testers to choose their favorite report format (the test program adds a built-in EXCEL report editing function to extend the previous format of a single report)
D. The length, power unit, and display digits adopt dynamic interchange mode, power unit T, Kg, N, KN, g, lb, deformation unit mm, cm, inch.
E. Automatic Auto Scale of graph curve scale, which can make graph display in proper scale. And can switch dynamically in real-time graphics during testing. With load-displacement, load-time, displacement-time, stress-strain load-2 point extension diagram, and multi-curve comparison.
F. The test result can be output in the form of data in EXCEL format.
G. After the test, it can be automatically archived and manually archived. After the test, the maximum strength, upper and lower yield strength, hysteresis loop method, stepwise approximation method, non-proportional extension strength, tensile strength, compressive strength, and elongation strength at any point can be automatically calculated. , Any point fixed load extension, elastic modulus, elongation, peeling interval maximum, minimum, average, net energy, return energy, total energy, bending modulus, break point displacement x% load, break point load X% Displacement, etc. Data backup: test data can be saved in any hard disk partition.
H. Multiple languages switch randomly: Simplified Chinese, Traditional Chinese, English.
I. The software has a historical test data demonstration function.
Summary description:
Clear: After the computer controls the test command, the system will automatically clear;
High intelligence: After the test, the fracture is automatically judged and the fixture automatically returns to the initial position
Multi-function: different fixtures can be replaced to carry out different tests;
Automatic shift: switch to different grades according to the size of the load;
Change speed: the test speed can be changed arbitrarily
Control method: Test methods such as test force, test speed, displacement and strain can be selected.
Powerful: Record test data throughout the process. Provides functional services such as saving, comparison and tracking. The mouse can be used to arbitrarily find out the point-by-point force value and deformation data analysis of the test curve, and it can be partially enlarged and compared.
Multiple protection: with automatic limit and automatic overload pr


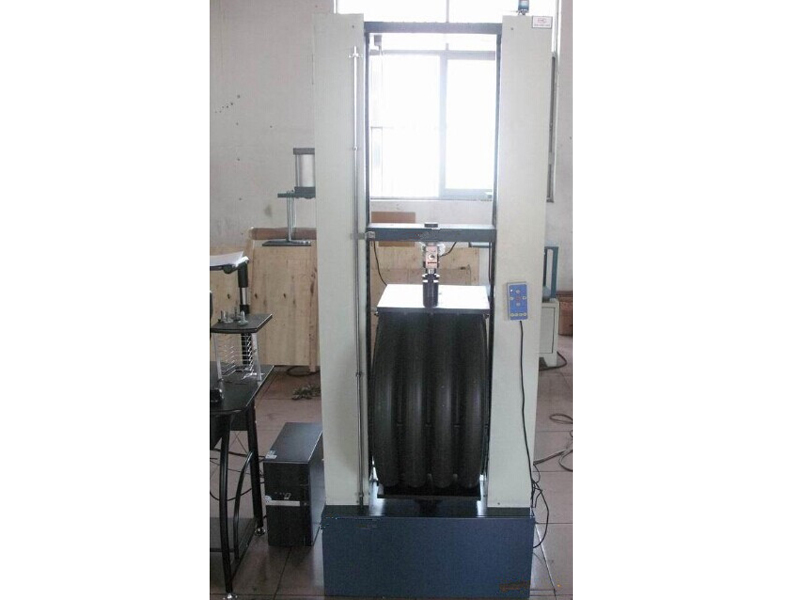
ZY-50kN pipe ring stiffness testing machine
1. Product introduction:
The microcomputer control ring stiffness testing machine is easy to operate and has stable and reliable performance. The system uses a high-precision controller and a speed control system to control the rotation of the servo motor. After the deceleration system is decelerated, the beam is driven up and down by the precision ball screw pair to complete the tensile mechanical performance test of the sample. It is pollution-free, low noise, and efficient. High, with a wide speed range. Comply with the design basis of this machine: "GB/T9647-2003 Thermoplastic Pipe Ring Stiffness Determination", GB/T18477-2001 "Unplasticized Polyvinyl Chloride (PVC-U) Double Wall Corrugated Pipe for Buried Drainage"; GB/T18998. 2-2003 "Industrial Chlorinated Polyvinyl Chloride (PVC-C) Piping System Part 2: Pipes" GB/T9647-2003 "Determination of Ring Stiffness of Thermoplastic Pipes" requirements. This machine is widely used in material inspection and analysis in steel metallurgy, building materials, aerospace, machinery manufacturing, wire and cable, rubber and plastic, textile, home appliances and other industries. It is used for scientific research institutions, universities, industrial and mining enterprises, technical supervision, and commodity inspection arbitration. The ideal test equipment for departments.
The pipe ring stiffness testing machine adopts a fully digital servo speed control system with high speed control accuracy and stable performance and a servo motor as the drive system. The precision controller is the core of the control system. The control and data processing software with WINDOWS as the operation interface realizes the test force. , Test force peak value, beam displacement, test deformation and test curve screen display, all test operations can be automatically completed on the computer through the mouse. Good humanized design makes the test operation easier.
2. Main technical indicators:
1. Test force: 50kN
2. Measuring range: 2%—99% of the maximum test force (0.4%—99%)
3. Accuracy level of testing machine: Class I
4. Test force accuracy: better than ±1% of the indicated value
5. Beam displacement measurement: resolution is 0.001mm
6. Deformation accuracy: better than ±1%
7. Speed adjustment range: 1-300mm/min
8. Test space: 800mm up and down, width>350mm
9. Host form: portal frame structure
10. Host size: 730*590*1850mm
11. Weight: about 350Kg
12. Working environment: room temperature~45℃, humidity 20%~80%
3. Main functions and features:
1. Host:
1.1 The machine adopts a portal space structure; downward pressure.
1.2 The speed control system adopts servo motor and speed governor, with stable and reliable performance, and has protection devices such as overcurrent, overvoltage, and overload. The speed range can reach 1~200mm/min.
1.3 The transmission part adopts circular arc synchronous toothed belt, precision screw pair transmission, stable transmission, low noise and high transmission efficiency.
2. Control system, operating software and data processing system
2.1 The computer control system has the advantages of high integration, stable performance and convenient adjustment. The experimental data can be collected in real time, and the experimental characteristic curve can be displayed dynamically in real time. The experimental data files can be saved in Access common databases or SQLserve large databases, which facilitates the realization of customer resource sharing and network management, as well as user re-analysis. For user-defined various word2000 reports, the software can be easily accessed, which solves the problem that different users or the same user have different needs for test reports in different periods. The software can process the original data of test force, displacement, time, deformation and curves derived therefrom.
2.2 Protection function: The machine has two limit protection modes, software and mechanical, and the proportion of automatic shutdown when the maximum load is exceeded can be dynamically set; it has multiple protection functions such as overcurrent, overvoltage, and overload.
2.3 The load and deformation channels can be automatically marked, which is intuitive and convenient.
2.4 The batch test can realize the hierarchical display of the curve, and the curve automatically follows.
2.5 The software can realize user-defined speed setting and computer adjustment of speed. It can also achieve high-precision speed calibration, and adjust the speed gear and code at any time.
2.6 Monitoring the test process: Real-time display of various parameters such as test force, deformation, displacement, and curve during the test process.
2.7 Software authority classification management function: In order to improve the security of software and data, the software can realize the function of authority management by setting different password protection.
2.8 Result reproduction function: After the test operation is completed and saved, it


Previous page
1
Next page
Yangzhou Zhengyi Testing Machinery Co., Ltd.
Service Hotline:
Add:
Address: Zhenxing North Road, Zhenwu Town, Jiangdu District, Yangzhou City, Jiangsu Province
Copyright: Yangzhou Zhengyi Testing Machinery Co., Ltd. 苏ICP备14021115号-4 Powered by:www.300.cn


