Number of views:
1000
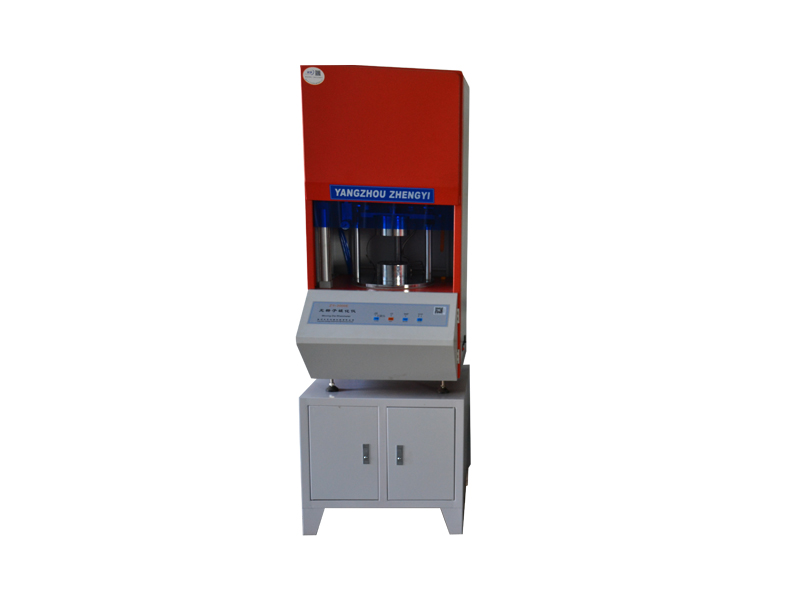
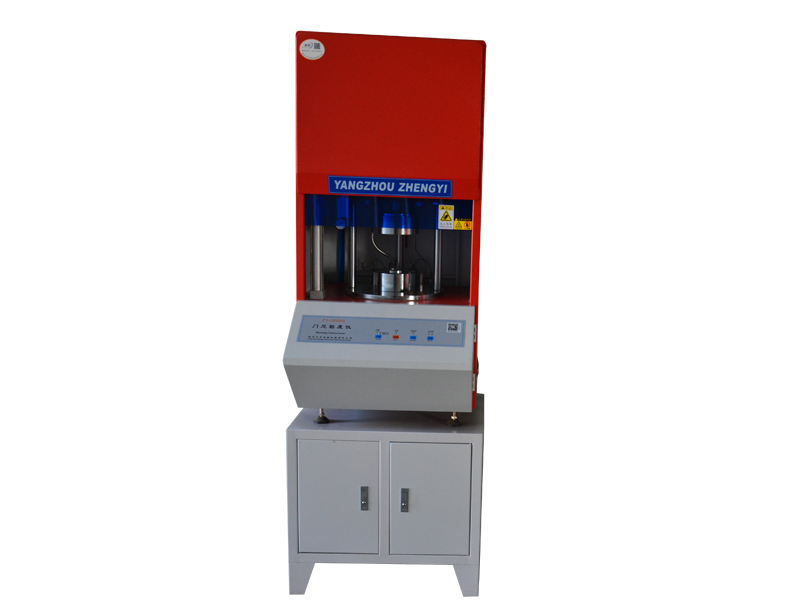
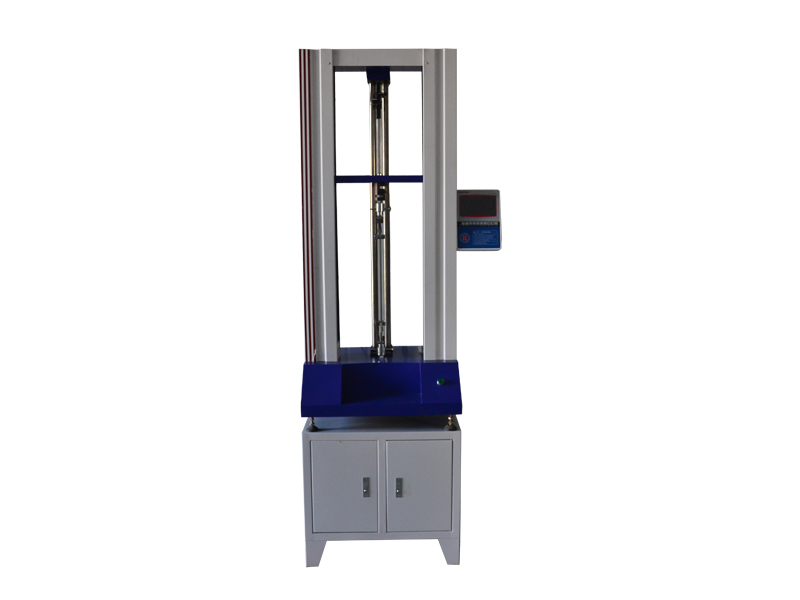
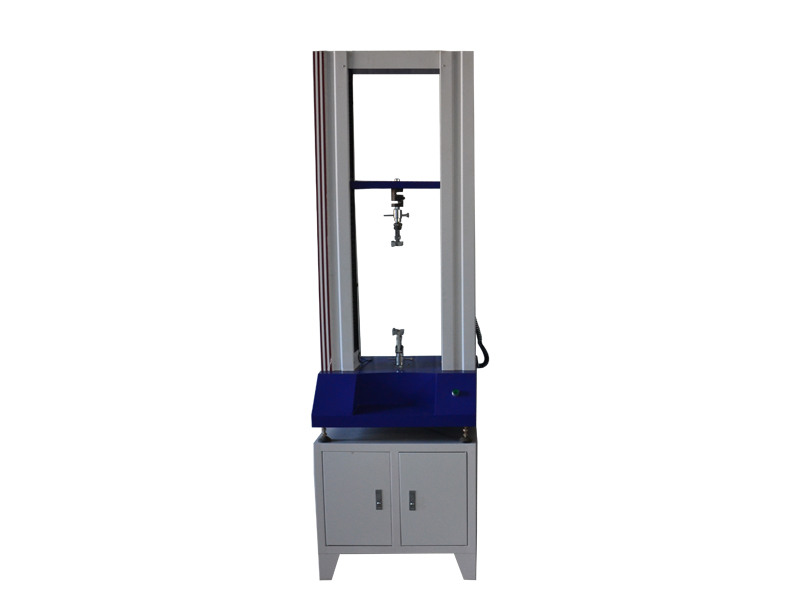
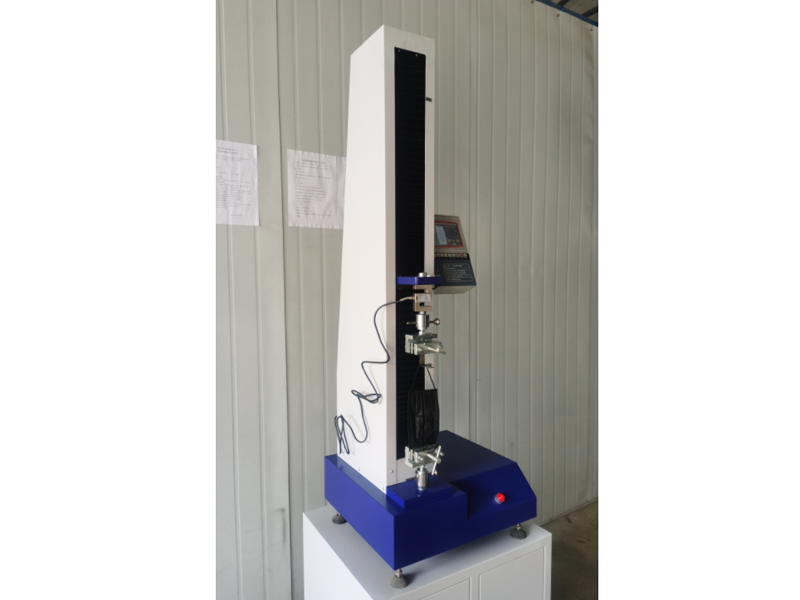
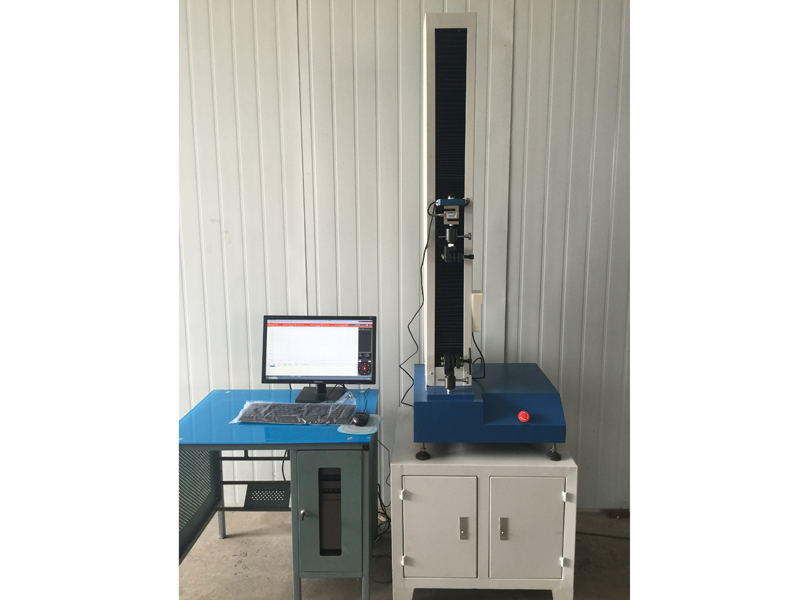
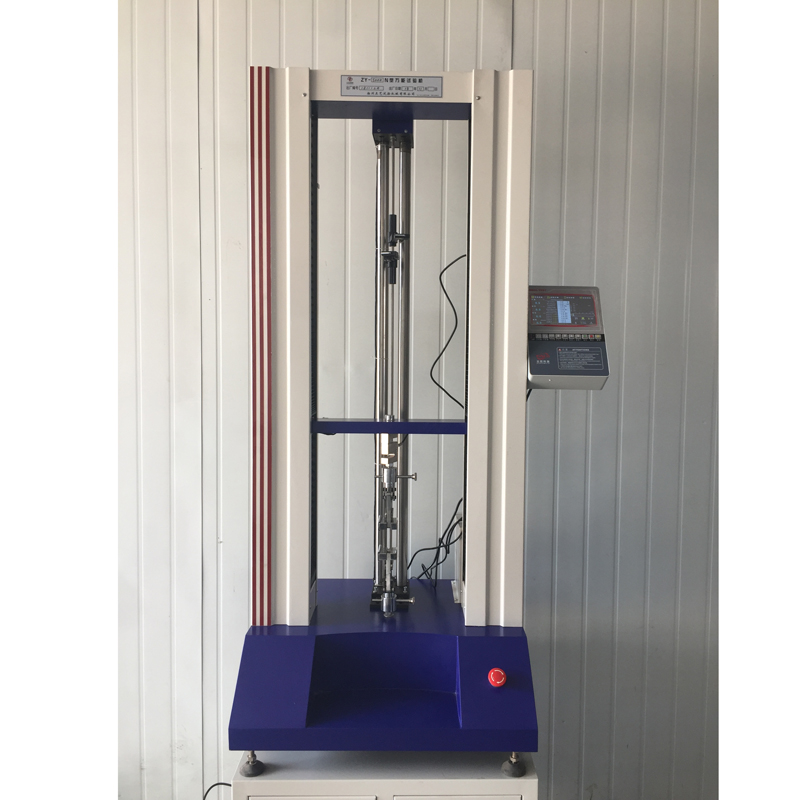
ZY-50kN Static Load Testing Machine
Retail price
0.0
元
Market price
0.0
元
Number of views:
1000
Product serial number
044
Quantity
-
+
Stock:
0
Product description
Parameters
The static load testing machine can test rubber, plastics, foam materials, plastics, films, textiles, fibers, polymer materials, composite materials, synthetic materials, packaging tapes, paper, wires and cables, fiber optic cables, safety belts, safety belts, leather Belts, shoes, tapes, polymers, spring steel, stainless steel, castings, non-ferrous metals, auto parts alloy materials and other non-metal materials and metal materials are stretched, compressed, bent, teared, 90° peeled, 180° Peel, shear, adhesion, pull-out force, elongation and other tests.
Host specifications
A. High-precision sensor: 50kN, force accuracy within ±0.5.
B. Capacity segmentation: Seven gears in the whole process: × 1, × 2, × 5, × 10, × 20, × 50, × 100 using high-precision 24 bits A/D, sampling frequency 200Hz, full force resolution 1/1000, 000
C. Power system: AC servo + servo motor + AC drive + reducer + polished rod linear bearing.
D. Control system: Use Pulse Command control method to make the control more precise. Speed control range 0.001~1000 mm/min. The linkage board adjustment has fast coarse adjustment and slow fine adjustment functions. After the test, it will automatically return to the origin and automatically store.
E. Data transmission method: RS232 transmission
F. Display mode: UTM107+WIN-XP test software computer screen display.
G. Concise linear double correction system for the first gear and precise seven gears throughout the entire journey.
H. The luxurious test interface software can realize constant speed, positioning shift, constant load (hold time can be set), constant load increase rate, constant stress increase rate, constant strain increase rate and other control modes, plus multi-level control modes can meet different requirements Test requirements.
I. Full displacement: Encoder 2500 P/R, 4 times higher accuracy. LINE DRIVE encoder with strong anti-interference ability. Displacement resolution is 0.001mm. K. Protection device: overload emergency shutdown device, upper and lower travel limit device, leakage automatic power-off system, automatic break point shutdown function.
J. Manual control method: manual operation box.
Software function:
A. Test standard modularity function: Provide users with the test standard settings required by the application, covering GB, ASTM, DIN, JIS, BS... etc. Test standard specification.
B. Sample data: Provide users with all sample data set by the user, and input the data once and use it repeatedly. The formula can be modified by itself to improve the fit of test data.
C. Double report editing: open user editing reports, for testers to choose their favorite report format (the test program adds a built-in EXCEL report editing function to extend the previous format of a single report)
D. The length, power unit, and display digits adopt dynamic interchange mode, power unit T, Kg, N, KN, g, lb, deformation unit mm, cm, inch.
E. Automatic Auto Scale of graph curve scale, which can make graph display in proper scale. And can switch dynamically in real-time graphics during testing. With load-displacement, load-time, displacement-time, stress-strain load-2 point extension diagram, and multi-curve comparison.
F. The test result can be output in the form of data in EXCEL format.
G. After the test, it can be automatically archived and manually archived. After the test, the maximum strength, upper and lower yield strength, hysteresis loop method, stepwise approximation method, non-proportional extension strength, tensile strength, compressive strength, and elongation strength at any point can be automatically calculated. , Any point fixed load extension, elastic modulus, elongation, peeling interval maximum, minimum, average, net energy, return energy, total energy, bending modulus, break point displacement x% load, break point load X% Displacement, etc. Data backup: test data can be saved in any hard disk partition.
H. Multiple languages switch randomly: Simplified Chinese, Traditional Chinese, English.
I. The software has a historical test data demonstration function.
Summary description:
Clear: After the computer controls the test command, the system will automatically clear;
High intelligence: After the test, the fracture is automatically judged and the fixture automatically returns to the initial position
Multi-function: different fixtures can be replaced to carry out different tests;
Automatic shift: switch to different grades according to the size of the load;
Change speed: the test speed can be changed arbitrarily
Control method: Test methods such as test force, test speed, displacement and strain can be selected.
Powerful: Record test data throughout the process. Provides functional services such as saving, comparison and tracking. The mouse can be used to arbitrarily find out the point-by-point force value and deformation data analysis of the test curve, and it can be partially enlarged and compared.
Multiple protection: with automatic limit and automatic overload protection.
Automatic calculation: automatically calculate various test results, and can modify the report arbitrarily
Automatic length measurement: equipped with a high-precision encoder, automatically measuring the displacement stroke and elongation between punctuation.
High taste: finely crafted, smooth lines, coupled with high-precision software and hardware technology and integration capabilities, reflecting the exquisite manufacturing technology and dexterity.
The main technical parameters
1. Force resolution: 0.001-0.1N
2. System accuracy: less than ±0.1
3. Test force: 50000N
4. Accuracy level: I level
5. Test force measurement range: 1-1990%
6. Test force indication error: less than or equal to 0.3%
7. Test force resolution: 0.001
8. Displacement resolution: 0.001
9. Displacement indication error: less than or equal to 0.5%
10. Speed range: 0-400mm/min
11. Elongation tracking error: ±0.1mm
12. Power supply voltage: AC220V±10% 50Hz
Configuration
1. Longmen double column type.
2. One high-precision sensor
3. Japan Omron high-precision photoelectric automatic tracker
4. The testing machine software has functions of automatic calculation, storage, comparison, etc.
5. Servo control system
6. Servo motor
7. Thomson high-precision ball screw
8. Shanghai Jinzhu reducer transmission, no noise, no vibration, stable operation
9. Special test fixture
10. 19-inch Lenovo LCD computer, HP color printer.
Previous
None
Next
None
Recommended Products
ZY-2000E Rubber Rotorless Vulcanizer
The ZY-2000E computerized rotorless vulcanizer adopts a computer-controlled imported temperature controller for accurate temperature control. The computer can process data in a timely manner and can perform statistics, analysis, storage and comparison, etc., humanized design, easy operation, accurate data, and optimized formula for rubber Provide accurate data. The buttons of the mouse on the computer of this vulcanizer have the same function as the buttons on the host panel, which is convenient for users to operate. The computer software interface is quite good and it is extremely convenient to use. Users can accurately measure the scorch time, positive vulcanization time, and vulcanization index. , Maximum and minimum torque, etc., is the ideal equipment for rubber industry to control the quality of rubber materials, rapid inspection and rubber extrusion research.


Sulfur change meter
1. Introduction:
The ZY-2000E rubber vulcanization analyzer adopts a computer-controlled imported temperature controller for temperature control. The computer can process data in a timely manner and can perform statistics, analysis, storage and comparison, etc., humanized design, easy operation, accurate data, and provide accurate rubber formula data. The buttons of the mouse on the computer of this vulcanizer have the same function as the buttons on the host panel, which is convenient for users to operate. The computer software interface is quite good and it is extremely convenient to use. Users can accurately measure the scorch time, positive vulcanization time, and vulcanization index. , Large and small torques, etc. It is an ideal equipment for rubber industry to control the quality of rubber materials, rapid inspection and rubber extrusion research.
ZY-2000E Rubber Vulcanometer is a new generation of mechatronics product launched by our factory. It is mainly composed of host, sensor, computer, data collector of lower computer, printer and electric chain.
Executive standard: ASTMD5289-95 ISO6502:1991 HG/T3709-2003
Provide vulcanization curve, temperature curve diagram. Single curve test, continuous test of any curve and comparison test of any curve are possible on the same interface, the data is stored in the database, and all curve data can be printed in real time or in history.
2. Technical parameters:
Executive standard: GB/T16584, ISO-6502
Cavity structure: fully enclosed
Temperature control range: normal temperature -200℃
Temperature fluctuation: ≤±0.1℃
Temperature display resolution: 0.01℃
Torque range: 0-20N.M
Torque display accuracy: 0.001 N.M
Power supply: 50HZ, ~220V±10%
Compressed air: ≥0.40Mpa
Swing frequency: 100cpm (1.7HZ)
Swing angle: ±0.5. ±1.
Torque range: (0-5N.m, 0-10N.m 0-20N.m) automatic
Ambient temperature: 0-35°C relative humidity <80%
Setting range of vulcanization time: 2-300min, t90 is in the range of 10 seconds to 5 hours.
Print content: date, time, temperature, curing curve, temperature curve, ML, MH, ts1, ts2, t10, t90, Vc1 Vc2
Dimensions: 600*700*1250mm
3. Main features:
1. This instrument adopts a truly closed cavity, and its repeatability and test data are comparable to Alpha
2. This instrument is based on a large-scale database development platform, and the temperature control device adopts software to directly control and collect and process.
3. This instrument has the functions of statistics, analysis, storage and comparison. Humanized design, easy to operate.
Fourth, the main configuration:
1. The real high-precision closed cavity structure is synchronized with American Alpha.
2. Joint venture high-precision sensor with accuracy of 0.001N.M
3. Japan NSK high-precision bearings.
4. High-performance cylinders of SDPC Group, a Sino-British joint venture.
5. Sino-foreign joint venture Delixi pneumatic components.
6. Special modules with powerful functions, the test data is synchronized with Alpha.
7. The working door automatically rises and falls.
8. The key parts of electronic components adopt military components, with reliable quality and stable performance.
9. The computer software directly controls the temperature, and the accuracy of Alpha technology reaches 0.01℃.
10. 19-inch Lenovo LCD computer, HP color printer.
11. Taiwan built SUNON cooling fan to protect electrical appliances from malfunctioning and truly worry-free.


ZY-2000G Mooney Viscometer
ZY-2000G computer Mooney viscometer, measuring and temperature control circuit is composed of measuring and control module, platinum resistance, heater, can automatically track changes in the power grid and ambient temperature, automatically correct PID parameters, to achieve the purpose of rapid and accurate temperature control. The data acquisition system and electromechanical interlock complete the automatic test of the torque signal during the rubber test process, and automatically display the temperature value and set value in real time. After vulcanization, automatic processing, automatic calculation, printing Mooney, scorch curve and process parameters. The computer displays the test process in real time, and the changes of "temperature" and "time-Mooney" can be seen clearly from above. It is an indispensable instrument in the reclaimed rubber, rubber, wire and cable industries.


ZY-5000N rubber electronic tensile machine (digital display type)
ZY-5000N rubber electronic tensile machine is an instrument used to test the mechanical properties of materials such as stretching, peeling, tearing, and H extraction. It is widely used in rubber, plastic, textile, chemical, steel wire, hose tape, wire and cable, plastic, pipe and other industries. It is a high-precision, economical and practical instrument.
The tensile machine is composed of a host, a speed control system, data acquisition and processing, sensors and electrical interlocking parts. The host includes the fuselage, transmission mechanism, and measurement system. Data processing is handled by a microcomputer processor. This machine uses a stepping speed regulator to change the stretching speed, and the speed value is directly read out. The motor moves the lower gripper (fixture) through the V-belt-worm-screw drive, so as to realize the tensile change of the sample. The head of the main unit is equipped with a tension sensor, and its upper end is connected with the connecting plate of the top beam of the main unit, and the lower end is connected with the upper clamp. The sensor is only subject to vertical tension and is not affected by torsion or directional force to ensure force measurement accuracy. Between the upper and lower grippers, the force of the sample during the test is transformed into an electrical signal through the force sensor and input into the microcomputer acquisition control system. After the test is over, it is automatically processed, automatically calculated, and the result is displayed.
The touch LCD measurement and control system adopts 32-bit ARM technology and DSP high-performance processor control technology. The display part adopts a 7-inch 65K color ultra-clear touch screen with a resolution of 1024*768. The ultra-high performance configuration makes the software function and user experience great improve. The software includes boot animation, main screen display, large curve display, unit setting, multiple test standard selection and result calculation display, equipment status display, hardware parameter setting, equipment calibration, PID parameter setting, custom parameter editing, sample plan Editing, sample size editing, visual printing and other functions, the micro printer supports a variety of models to choose from, and the motor control supports free switching of multiple control methods such as servo, stepping, frequency conversion, and DC (the factory does not need to replace the system, and the standard features).
This test measurement and control system is a high-performance measurement and control instrument designed specifically for electronic testing machines that integrates measurement and control. It can perform tensile, compression, bending, shear, tear, and peel tests. The software can complete the maximum force, maximum deformation, tensile strength, elongation at break, total elongation at maximum force, elongation at yield point, elongation after fracture, upper and lower yield strength, elastic modulus, force at yield point, and elongation at break , Calculation and real-time display of parameters such as elongation at yield point, tensile strength at break, tensile stress at yield point, constant elongation stress, constant elongation (according to user-specified constant force level) and other parameters, among which the level of constant elongation The value and the constant force level value can be entered into the relevant position of the software in the sample parameter interface according to the actual requirements of the customer. The parameters that can be calculated also include compressive strength, upper and lower compression yield strength, compression elastic modulus, bending strength, bending elastic modulus, average bending force, average peel force, peel strength, maximum peel force, minimum peel force, tear strength , Average shear force, shear strength, shear modulus and other mechanical and physical properties related parameters.
Main interface function introduction


ZY-5000N Rubber Electronic Tension Machine
ZY series electronic tensile machine can be used for rubber, plastic, foam material, plastic, film, textile, fiber, polymer material, composite material, synthetic material, packaging tape, paper, wire and cable, fiber optic cable safety belt, leather belt, shoe Types, tapes, polymers, spring steel, stainless steel, castings, non-ferrous metals, auto parts alloy materials and other non-metallic materials and metal materials for stretching, compression, bending, tearing, 90° peeling, 180° peeling, shearing Cut, adhesion, pull-out force, elongation and other tests.
Host specifications


ZY-500N Mask Tensile Machine
The ZY-500N mask tensile machine is an instrument used to test the mechanical properties of materials such as stretching, peeling, tearing, and H extraction. It is widely used in rubber, plastic, textile, chemical, steel wire, hose tape, wire and cable, plastic, pipe and other industries. It is a high-precision, economical and practical instrument.


ZY-500N Mask Tensile Machine
The ZY series mask tensile machine is used to measure the tensile properties of various masks.
The appearance of this machine is novel and generous. Computer digital speed control system, equipped with force sensor and automatic elongation tracking device, good stability. Electrical appliances use PC and interface circuit boards to collect, store, process and print test results. The maximum force, yield force, average peel force, maximum deformation and other basic physical properties of the material can be calculated. During the test, the microcomputer collects the force value and deformation signal in real time, and the software displays the "force value-displacement" curve. After the test, it automatically calculates and saves the parameters, and can print out the report form the user needs.
2. Structural principle
The host is composed of an electronic speed regulation system, a transmission mechanism, a force measurement system and an extension automatic tracking device.
Electronic speed control system: The machine adopts AC speed control, corresponding to the stretching speed of 1-Xmm/min (X is the user's bottom request), and returns at high speed.
Elongation tracking device: This device is used to measure the deformation of the sample. It can be tracked by an external tracker or a built-in tracker. It can also be tracked by the deformation device built in the motor without the tracker.
3. Main technical parameters
1. Force resolution: 0.001-0.1N
2. System accuracy: less than ±0.1
3. Maximum test force: 500N
4. Accuracy level: 0.5
5. Test force measurement range: 1-99%
6. Test force indication error: less than or equal to 0.3%
7. Test force resolution: 0.001
8. Displacement resolution: 0.001
9. Displacement indication error: less than or equal to 0.5%
10. Speed range: 0-500mm/min (special requirements can be customized)
11. Large stroke of gripper: 800mm
12. Elongation tracking error: ±0.1mm
13. Power supply voltage: AC220V±10% 50Hz
14. Net weight: 120KG
Four, characteristics
Automatic clearing: After the computer controls the test command, the system automatically clears;
High intelligence: After the test, the fracture is automatically judged and the fixture automatically returns to the initial position
Multi-function: different fixtures can be replaced to carry out different tests;
Automatic shift: switch to different grades according to the size of the load;
Change speed: the test speed can be changed arbitrarily
Control method: Test methods such as test force, test speed, displacement and strain can be selected.
Powerful: Record test data throughout the process. Provides functional services such as saving, comparison and tracking. The mouse can be used to arbitrarily find out the point-by-point force value and deformation data analysis of the test curve, and it can be partially enlarged and compared.
Multiple protection: with automatic limit and automatic overload protection.
Automatic calculation: automatically calculate various test results, and can modify the report arbitrarily
Automatic length measurement: equipped with a high-precision encoder, automatically measuring the displacement stroke and elongation between punctuation.
High taste: finely crafted, smooth lines, coupled with high-precision software and hardware technology and integration capabilities, reflecting the exquisite manufacturing technology and dexterity.
Five, configuration
1. Single column type.
2. One high-precision sensor
3. Japan Omron high-precision photoelectric automatic tracker
4. The testing machine software has functions of automatic calculation, storage, comparison, etc.
5. High precision control drive system
6. High precision closed loop motor
7. German Thomson ball screw
8. Synchronous belt wheel transmission, no noise, no vibration, stable operation
9. 1 special test fixture
10. 19-inch Lenovo LCD computer, HP color printer.


ZY-5000N plastic electronic tensile machine (double column digital display)
ZY-5000N plastic electronic tensile machine is an instrument used to test the mechanical properties of materials such as stretching, peeling, tearing, and H extraction. It is widely used in rubber, plastic, textile, chemical, steel wire, hose tape, wire and cable, plastic, pipe and other industries. It is a high-precision, economical and practical instrument.


News
Yangzhou Zhengyi Testing Machinery Co., Ltd.
Service Hotline:
Add:
Address: Zhenxing North Road, Zhenwu Town, Jiangdu District, Yangzhou City, Jiangsu Province
Copyright: Yangzhou Zhengyi Testing Machinery Co., Ltd. 苏ICP备14021115号-4 Powered by:www.300.cn


